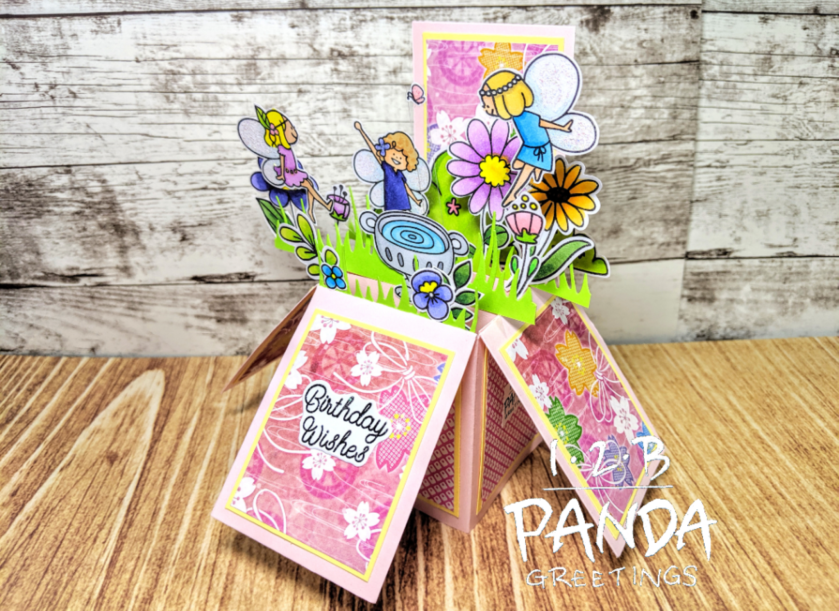
Waffle Flower Little Fairies Box Pop Up Card

I absolutely adore the work of some illustrators! This particular post is in admiration for Kamo who illustrates for Waffle Flower! I love how she draws her people and animals. They’re simply adorable. I’m slowly building my Waffle flower collection and looking at what I have, it’s mostly stamp sets designed by Kamo.

I’ve been sitting on this idea with these cute fairies from Waffle Flower’s Little Fairies stamp set for a while. I’ve had the stamp set sitting on my desk and everything but my work place shoulder injury really killed my crafty mojo. Now that I’m slowly getting back into things, this idea can finally come into fruition!
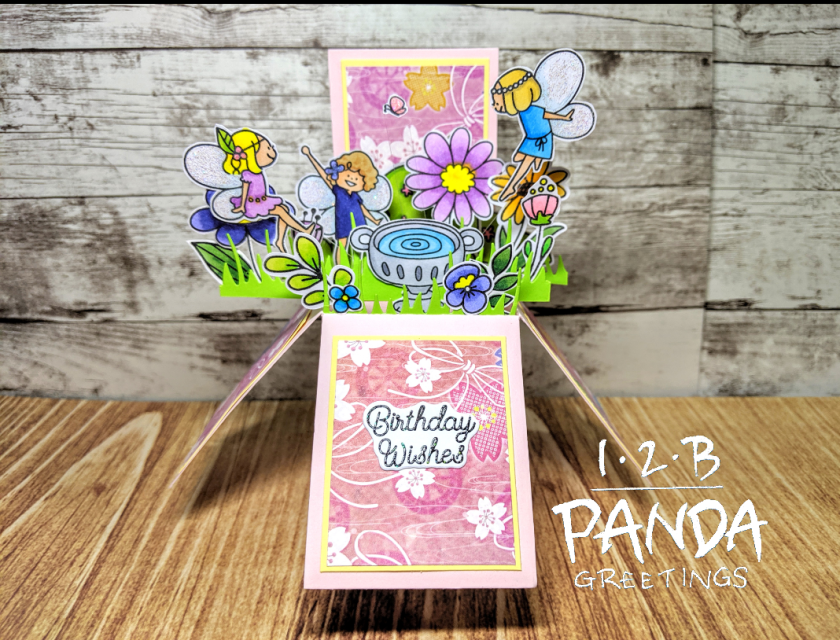
Screenshot_20190715-101216_2

If you’re unfamiliar with box cards, you can check out my box card base tutorial below:
Screenshot_20190715-101131_2
Front of Card

Screenshot_20190715-101145_2
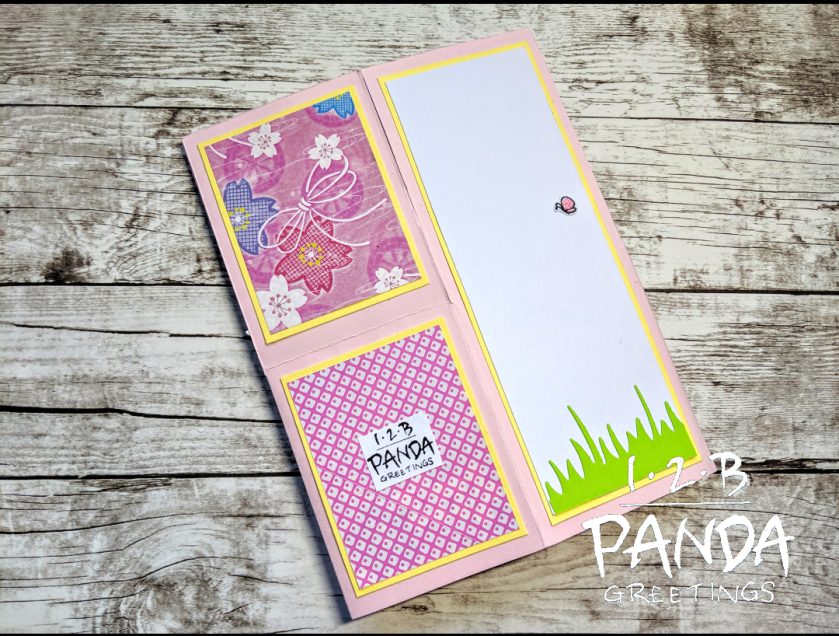
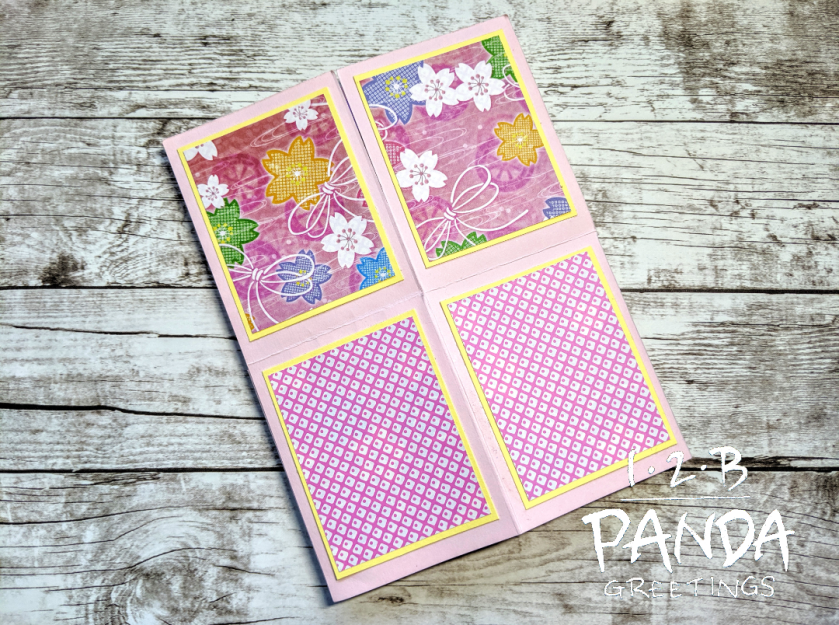
Back of Card

The patterned paper for this card was actually origami paper that I acquired at Daiso. This box card had 4 slats in the box to start.

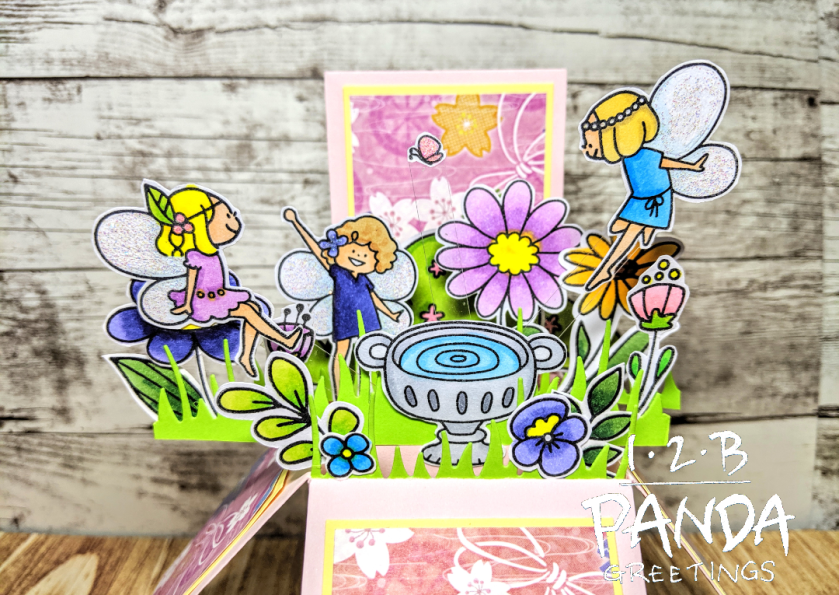
I stamped the images from Waffle Flower’s Little Fairies and Spring Time Stamp sets with Hero Arts Intense Black Ink and coloured them with Copic Markers. I used the following marker colours for this project: R21, R23, BV08, BV04, BV02, V15. V12, V01, Y08, Y06, Y21, Y38, Y35, Y28, C5, C3, C1, 0, B05, B02, B00, B000, E95, YR00, E33, E31, YG17, YG03, G28, and G24.
Screenshot_20190715-101157_2

This is kind of a tangent but DID YOU KNOW that coordinating dies from Waffle Flower come detabbed?! That means you don’t have to take your snips to cut them apart! You know what else is super awesome!?! Their coordinating dies also include a die that cuts around the sentiment! Isn’t that awesome?! Am I the only one that gets excited about stuff like this? lol

For the butterfly and fairy wings, I adhered Lawn Fawn’s Prisma Glitter with a Sakura Quickie Glue Pen.

I die cut 3 grassy edges using Lawn Fawn’s Meadow Borders and adhered them on tabs and onto the front of the box card and slats 1 and 3.

On my second slat, I adhered one fairy and a butterfly onto strips of acetate to make them appear as if they were floating. The purple flower was also adhered onto acetate to create depth to my scene.

I adhered a large bush image onto card stock tabs and onto my 4th slat, a small bush directly to the background of my box card, and adhered everything else to the grassy borders.

I stamped out the sentiment, “Birthday Wishes”, with Versafine Onyx Black Ink and heat embossed it with Hero Arts Sparkle Embossing Powder. I die cut out the sentiment with its coordinating die and adhered it to the front flap.

To decorate the writing space, I just adhered a bit of the grassy border to the bottom writing space and added a butterfly.
Screenshot_20190715-101224

You can check it out in action here:

You can check out more of Kamo’s work here.

You can check out other cards I’ve created using Kamo’s line of stamps below.

Cheers Slider Card

Cheers Ink Smooshed Birthday Card

Toadally Valentine’s Day Card

Jungle B-day Box Pop Up Card

This was also Day 30 of the 30 Day Colouring Challenge. You can find out more details here.

Thanks for stopping by!!
Mama Elephant Little Agenda Christmas Card

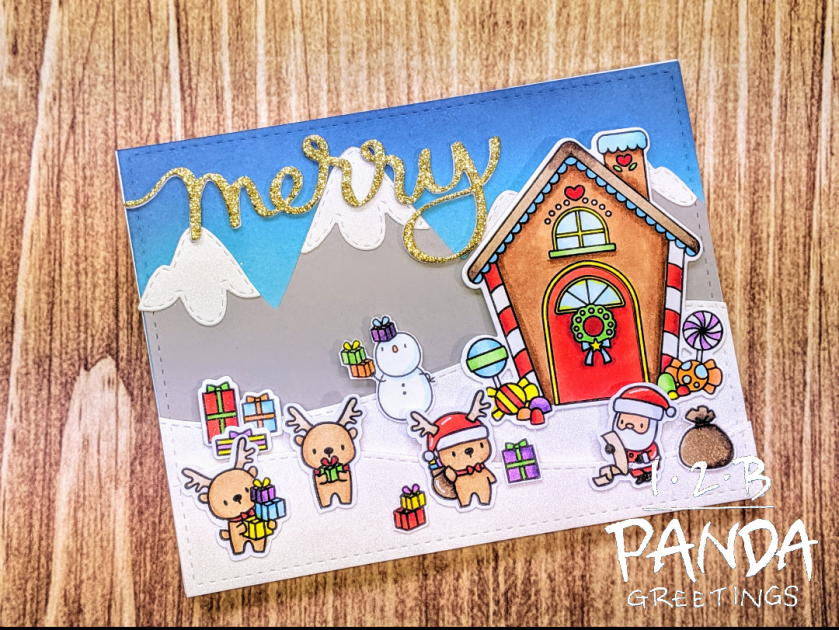
I wanted to create another entry for Mama Elephant’s Top Card Contest. I decided that I wanted to use something from Mama Elephant’s Little Agenda line of stamps. I had ordered the Little Panda Agenda stamps and I was hoping this stamp set would have come in time but I think it’s stuck at the border in customs :(. Hopefully, it’ll come in soon!! I had a hard time deciding what to use and eventually settled on making a Christmas card so I could use 3 of the Little Agenda sets! Is it too early to start making Christmas cards?

Screenshot_20190710-120617_2

I used Hero Arts Intense Black ink and stamped images from Mama Elephant’s Little Reindeer, Snowman, and Santa Agenda stamp sets, as well as, the house from A Christmas Cookie and the presents from Christmas Spirit! I used the following Copic Markers: E37, E33, E31, E49, E47, E43, E41, W7, W9, C1, 0, B000, B00, B02, R29, R35, R17, E95, YR00, YR02, YR04, Y06, Y08, YG06, YG11, V17, and V15. The house and presents were die cut using their coordinating dies while the other images I fussy cut.

I die cut mountains and hills with Mama Elephant Landscape Trio and Snow Capped Mountains Creative Cuts. To create the illusion of snow, I used white glitter paper from Recollections Holiday Glitz Glitter Paper Pad to cut the hills and the snow caps on the mountains.

Using the large stitched rectangle die from Mama Elephant’s Peek A Frames Creative Cuts, I die cut my card front and then used the die to die cut the stitched lines on the sides of the mountain and hills so the stitched line was continuous.

I took my card front and ink blended my background using Distress Oxide inks Tumbled Glass, Broken China, and Faded Jeans.

I adhered my mountains to my card front and then proceeded to adhere my hills and images popped up on 3M foam tape. Since I used glitter paper for my hills, I did have to use some liquid adhesive to adhere some of my stamped images to it. If you’re wondering what liquid adhesive I used, it was Lawn Fawn’s Glue Tube.

I die cut Mama Elephant’s Merry Script three times (1x Recollections Gold Glitter card stock, 2x 110lb white card stock) and adhered them stacked together then onto my card front.

To finish up my card, I used my Clear Wink of Stella and added shimmer to the presents and the candy on the house.

Hope you all like my first Christmas card for 2019!

This card was also entered into the 30 Day Colouring Challenge here.

Thanks for stopping by!

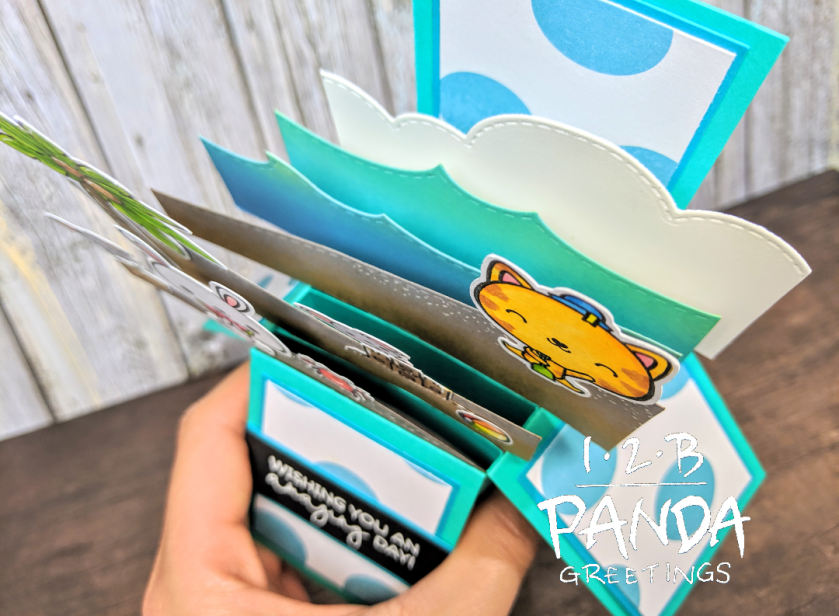
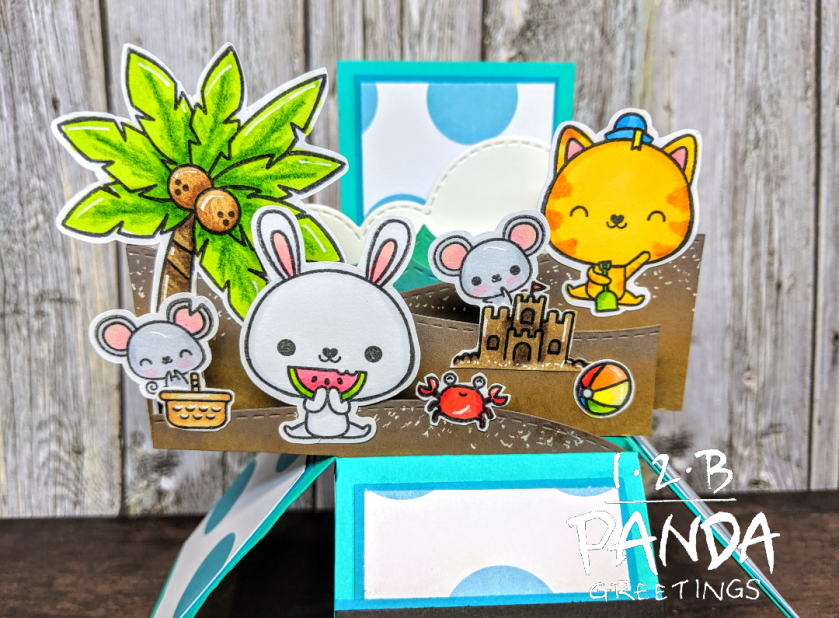
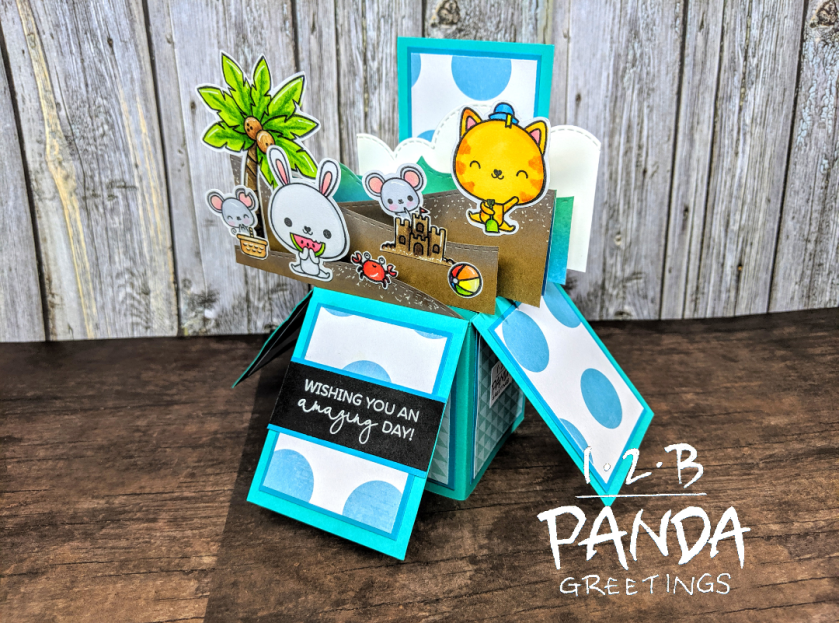
Mama Elephant Summer Day Box Pop Up Card

I love love love the stamp sets designed by Lucila Livschitz for Mama Elephant. She is known as “lulithebunny” on Instagram and she creates the cutest critter stamps! My absolute favourite stamp images designed by her are the mice from Tandem Ride and my favourite overall stamp set designed by her is Merry Mantle!

Mama Elephant’s Top Card Contest is going on right now and I had a hard time deciding what I was going to make for it! I’ve been really struggling lately trying to get my crafty mojo back and recovering from a workplace shoulder injury. I didn’t realize how much I used this joint until I couldn’t use it and the toll it would take on my other shoulder and my back in compensation. Sorry for the tangent *end rant* ^^”…

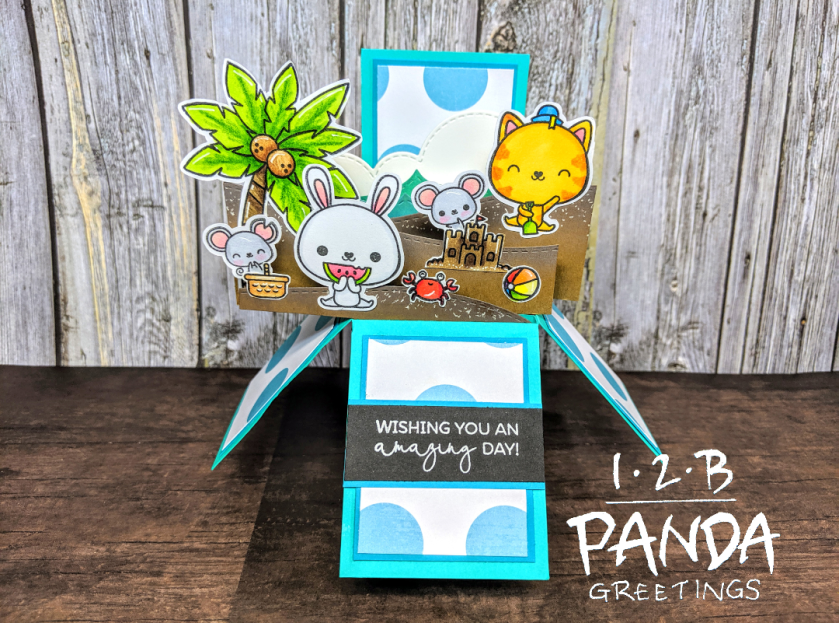
I decided to use a stamp set that I haven’t used yet so I pulled out Mama Elephant’s Summer Day! It’s July. The weather’s nice. I wish there was a beach closer to Edmonton. This stamp set was perfect!

Screenshot_20190705-155559_2

If you’re unfamiliar with box cards, you can check out my box card base tutorial below:

Screenshot_20190705-155631_2
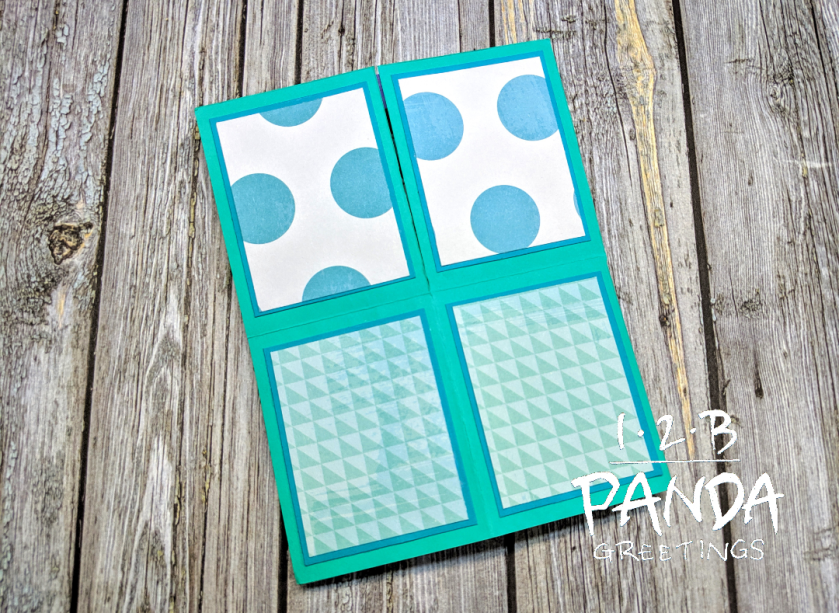
Front of Card

Screenshot_20190705-155622_2
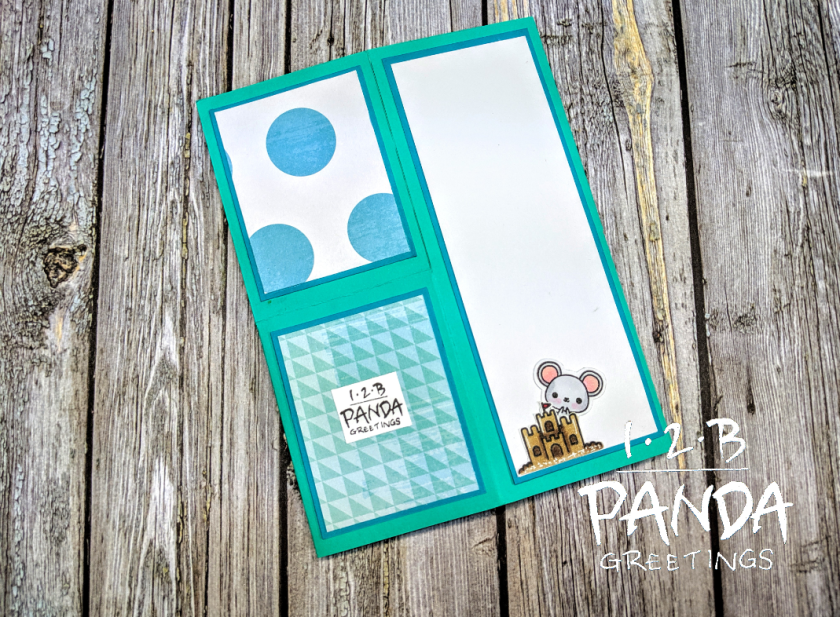
Back of Card

There are 5 slats in this box to start and I used patterned paper from Craft Smith Melon Patch Paper Pad.

Screenshot_20190705-155547_2

I stamped images from Mama Elephant Summer Day and Tandem Ride with Hero Arts Intense Black ink and cut them out. I coloured the images with the following Copic Markers/ Prismacolor Pencil Crayons:

Palm Tree: YG17, YG03, E31, E50, E47, E53, E43, E57
-Prismacolor: PC945 Sienna Brown, PC946 Dark Brown, PC944 Terra Cotta,
PC948 Sepia, PC908 Dark Green
Basket: E31, E33
Sandcastle: E47, E43
Bunny: C1, 0, YG03, YG17, RV14, RV13, R20
Cat: Y35, Y38, YR27, R20, RV13, B05, B02,YG17, YG03
Crab: R29, R17
Ball: R29, R17, YR16, YR02, Y06, Y11, YG17, YG03, B05, V17
Mice: C3, C1, R20, R22

Screenshot_20190705-155609_2

I die cut 3 sandy hill using Mama Elephant’s Landscape trio out of kraft card stock and ink blended the tops with Distress Oxide Ink Gathered Twigs and Walnut Stain and dotted the tops with my White Sakura Gelly Roll pen.

I used Mama Elephant’s Ocean Waves Trio and die cut 2 waves. I ink blended the waves with Distress Oxide ink Twisted Citron, Evergreen Bough, Mermaid Lagoon, and Chipped Sapphire.

I die cut the cloud border with Mama Elephant’s Landscape Trio.

I attached the sandy hills, waves, and cloud border onto tabs and adhered them to the box card slats. I adhered the images into my card using a Zig two Way Glue Pen.

I used the sentiment, “Wishing you and amazing day”, from Mama Elephant’s Picnic With Friends Stamp set and heat embossed it with Nuvo Glacier White Fine Detail Embossing Powder on black card stock.

For the writing space, I added another sand castle and mouse as a little decorative element.

Screenshot_20190705-155533_2

You can check it out in action here:

That finishes up my card. Wish me luck on the contest! If you are interested and would like to check it out for yourself, you can find more information here.

You can check out more of Lucila’s design work over on her website here.

This card was entered into Simon Says Stamps Monday Challenge here, as well as the 30 Day Colouring Challenge here.

Thanks for stopping by!

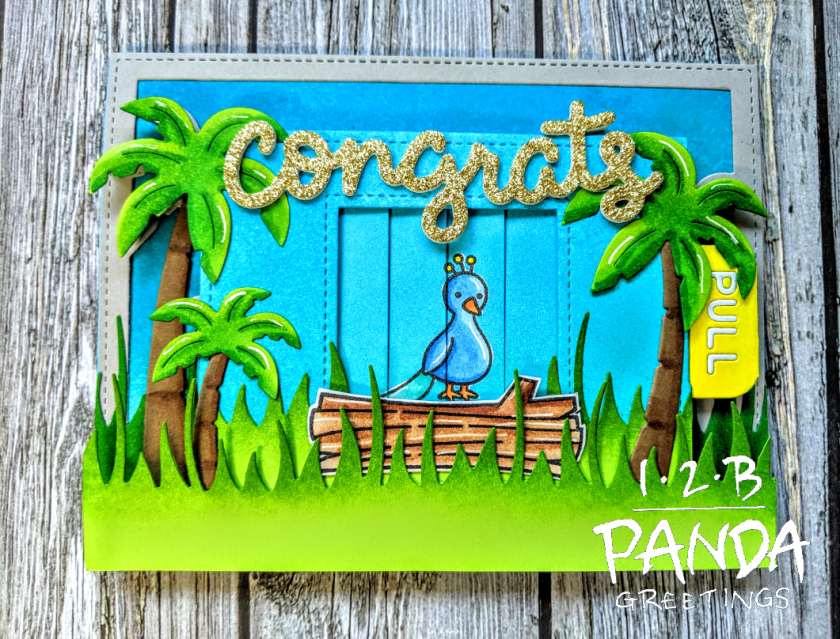
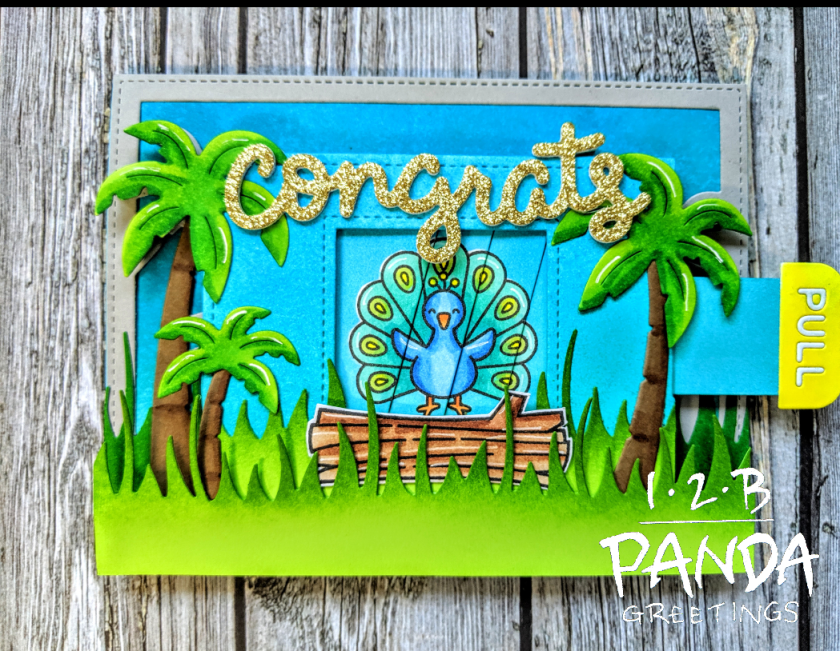
Lawn Fawn Peacock Before ‘n Afters Magic Picture Changer Congrats Card

When Lawn Fawn released the Peacock Before ‘n Afters stamp set I thought it would work great for a card that I wanted to make one of my residents at work! His residency was 5 years long and I thought it would be fitting and a good farewell if I made the whole team sign it!

I just wanted to mention that I did end up making this card twice. The first time it became defective :(. I had used Recollections 110lb paper and I found that the card stock itself actually started breaking apart and splitting into the individual layers of paper. I did use my antistatic powder tool on the slats to decrease the friction but it eventually became so weak that it ripped. So I was back a square one.

The second time around, I decided to cut the Magic Picture Slider slats using Bristol. The paper itself is smoother so I figured it would decrease the friction. I’m happy to report that the mechanism works really well using this paper.

Screenshot_20190616-192009_2

Screenshot_20190616-192027_2

Anyways so I cut the 2 pieces for the magic picture slider and stamped the peacock directly over the slats. I did apply more pressure to ensure that I got a clean impression on the slats. I also took some Inkadinkado Masking paper and created masks for both peacocks. I covered each peacock and ink blended the panels using Distress Ink Peacock Feathers and Mermaid Lagoon. To ink blend, I used some make up brushes that look like the Picket Fence Life Changing Brushes that I found at Miniso last week. I’m happy to report that they applied ink and blended AMAZING and only cost $8CAD. I also ink blended the window panel from the Lawn Fawn’s Magic Picture Changer Add On and a piece of A2 sized white card stock (panel for card front) in the same way.

I decided I wanted to use the new Lawn Fawn Tropical Backdrop and tried to figure out a way that I would incorporate it with the Magic Picture Changer. I decided to cut the panel out of light grey card stock and use the placement of the palm trees as a template. I cut out the trees individually out of a light green and kraft card stock and set them aside.

I cut the tall grass border from Lawn Fawn’s Meadow Borders 3 times and set it aside.

I didn’t want the peacock to look like it was floating so I stamped and fussy cut a log from Lawn Fawn’s Toadally Awesome stamp set and set it aside to colour.

I peeled my masks off the peacock to reveal the white card stock underneath and proceeded to colour them with Copic Markers. I used the following Copics:

Peacock: B18, B14, B12, BG49, BG23, BG13, YR07, YR04, YG03, YG00, Y06
Log: E37, E33, E31
Palm Trees: E37, E33, E31, YG00, G14, G17
Pull tab: Y06

I did some more ink blending with the grass panels and just ink blended Distress Ink Mowed Lawn to the panel on the magic picture changer and in front of it and used Lucky Clover on the grass panel behind it.

I adhered my Lawn Fawn Tropical Backdrop panel to my ink blended card front. I glued the grass panel that was ink blended with Lucky Clover and the trunk of the furthest left palm tree directly to the card front.

I started assembling my card by adhering the magic picture changer together with score tape. I applied the Pull tab with Lawn Fawn Glue. The “PULL” letters were die cut inlayed back into the tab. I adhered my grass, log, and palm trees onto my magic picture changer component then added a double layer of 3M foam tape to the back of the piece. I added a triple layer of 3M foam tape to the tops of the palm trees that were overhanging the Magic Picture changer component. I did slightly move the right palm tree so that it would not obscure the pull tab. I adhered the magic picture changer component to the card front. I added a triple layer of 3M foam to the bottom of the front grass piece and applied it to my card. I didn’t add any adhesive to the tops of the grass because I wanted it to have more dimension.

To finish up the card, I die cut Lawn Fawn’s Scripty Congrats 3 times- twice in 110lb white card stock and once in a gold glitter card stock and adhered them together by stacking the on top of each other.

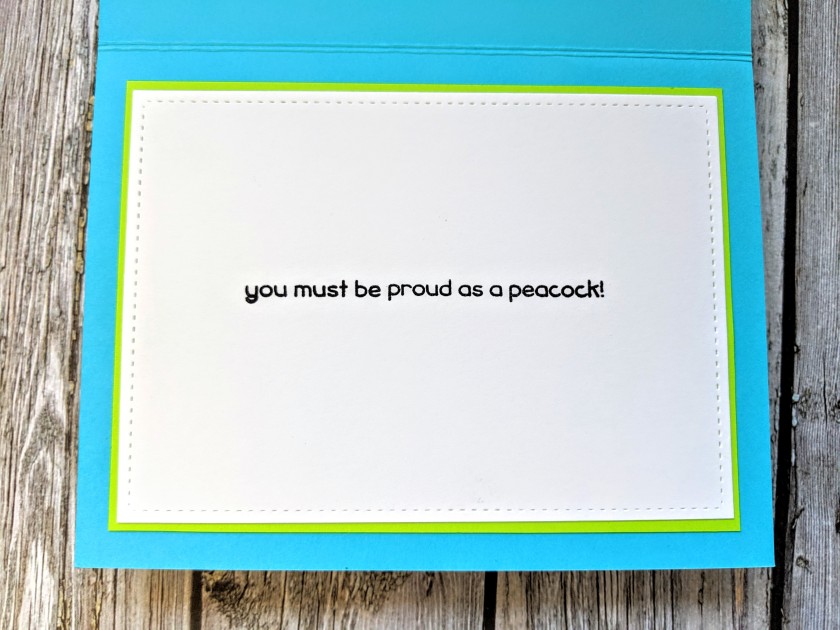
For the inside of the card, I die cut Lawn Fawn’s Large 4 Bar Stitched Rectangle and trimmed a matte out of green card stock for it. I stamped the sentiment, “you must be a proud peacock”, in Versafine Onyx Black Ink and heat embossed it with WOW Clear Gloss Embossing Powder. I didn’t want to add anything else to the inside because I wanted space for the whole team to be able to sign.

IMG_20190616_191240

You can check it out in action here:

This card was entered into the current Lawn Fawnatics Challenge here, as well as Simon Says Stamps Monday Challenge here, and the 30 Day Colouring Challenge here.

That finishes up my card, I hope you all liked it!

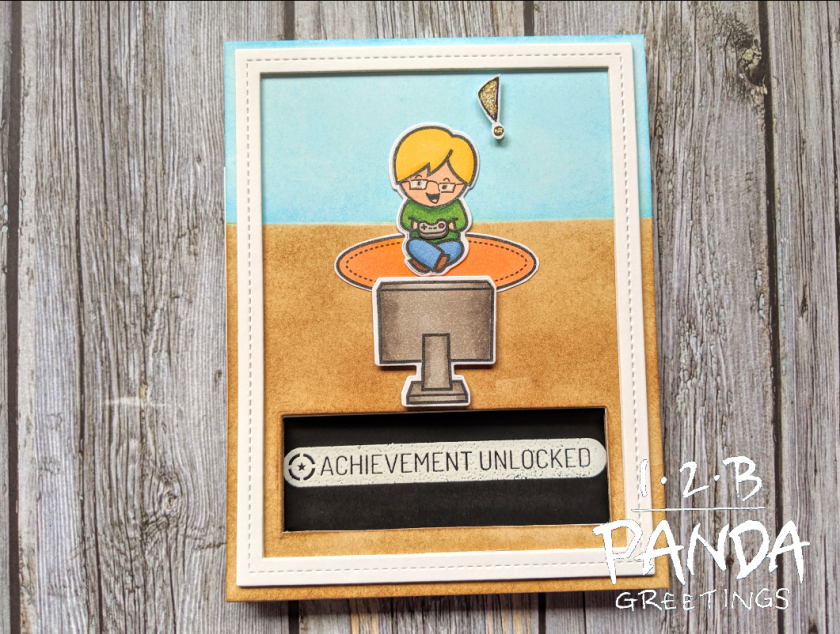
Lawn Fawn Screen Time Peek A Boo Wedding Card

A friend got married and I thought of this unconventional wedding card for him! Trying to find inspiration for this card and thinking of things that remind me of him, I thought of video games! Lawn Fawn’s Screen Time stamp set worked well for this project and was also in my “to-use” pile so it worked out perfectly! Although, I struggled a bit to try and tie it together until I realized I also had the retired MFT stamp set, Level Up. I loved the sentiments in this stamp set but I’ve never used it because I didn’t have anything that would match it, so it sat on my shelf for the last 2 years :(. It’s finally it’s time to shine!!!

Screenshot_20190616-192228_2

Screenshot_20190616-192409_2 (1)

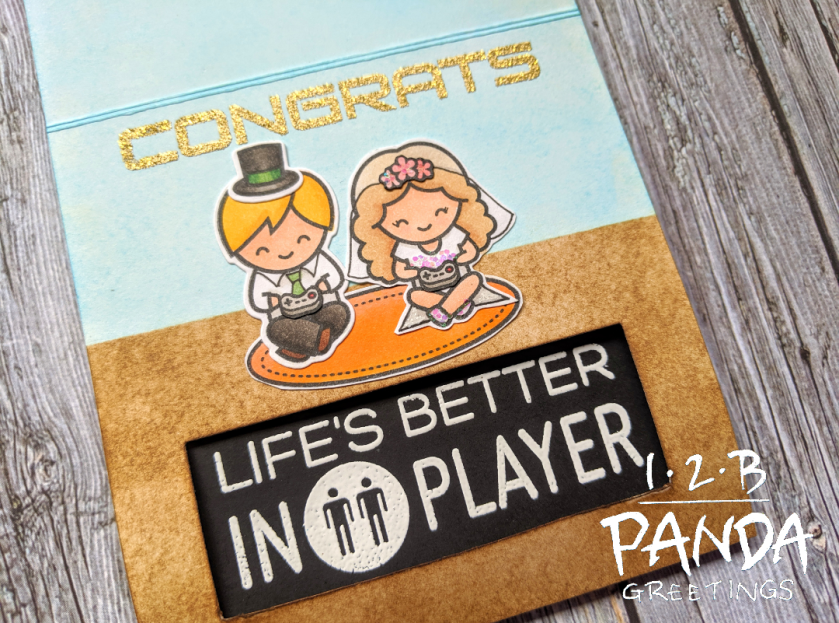
I set up the scene so that the peek a boo element was a depiction of the tv screen. I thought it would be funny if the boy from Screen Time accomplished something in his game but I didn’t want him to look the same as the inside of the card so when I stamped him, I removed the ink from his face so I could draw him a new face. I tried to make him look more like my friend and gave him glasses. I drew all these features with a black Copic Multiliner. I fussy cut the controller and took a black marker to the outer edge. I wanted him to have a look of excitement so I drew a large exclamation mark and coloured it in with my Versamarker so I could heat emboss it with Recollections Gold Tinsel Embossing Powder. I also stamped another boy, the girl, 2 more controllers, and the screen from the same stamp set. I stamped 2 rugs from Lawn Fawn’s Christmas Dreams, and a top hat and flower crown from Lawn Fawn’s Bicycle Built for you. For the people images inside the card, I also drew in the extra details with my Copic Multiliner to make them look like a couple getting married. I added extra details to the bride by adding glitter to the flower crown, dress, and shoes with my Quickie Glue Pen, as well as Clear Wink Of Stella to the veil and dress.

I coloured the images with the following Copic Markers:
Boy: Y38, Y35, G28, G24, YR00, E95, E59, E57, B97, B95, R20, W9, W7, W5, W2, 0, White Sakura gelly roll pen for glasses highlight
Girl: E33, E31, E95, YR00, R22, R32, R20, W2, E41, 0
Carpet: YR16, YR02
Screen: W7, W5, W3

For this card, I cut 3 pieces of card stock.
1. 4 1/4ā€³ x 8 1/4ā€³ (Score at 2 3/4ā€³)- FRONT
2. 4 1/4ā€³ x 8 1/2ā€³ (Score at 4 1/4ā€³)- INSIDE
3. 4 1/4ā€³ x 5 3/4ā€³ (Score at 5 1/2ā€³)- BACK

For the window of my Peek A Boo Card, I wanted it to be a rectangle the size of my larger sentiment (“Life’s Better in 2 Player”) but I didn’t have a rectangle of that size. Everything I had was too small or too big so I decided to take one slightly too big and make it work. I used the 4th smallest rectangle from MFT’s Rectangle Stax Set 1 and I ended up partial die cutting it. To make the rectangle the size that I wanted, I took a ruler and an exacto knife and cut it to make it work for me.

To get the windows to line up for the peek a boo element, I find the easiest way to do it is to die cut the front and inside panel at the same time (stacked perfectly on top of each other). It won’t cut through the second piece but it will indent it enough that you can place your die on it and die cut it again. So I end up die cutting 3 times. 1) front panel and inside panel stacked perfectly on top of each other to cut the front panel and indent the inside panel 2) inside panel folded at the score line to cut one side of the inside panel and indent the other side 3) to cut the other side of the inside panel.

PhotoCollage_20190703_155253186

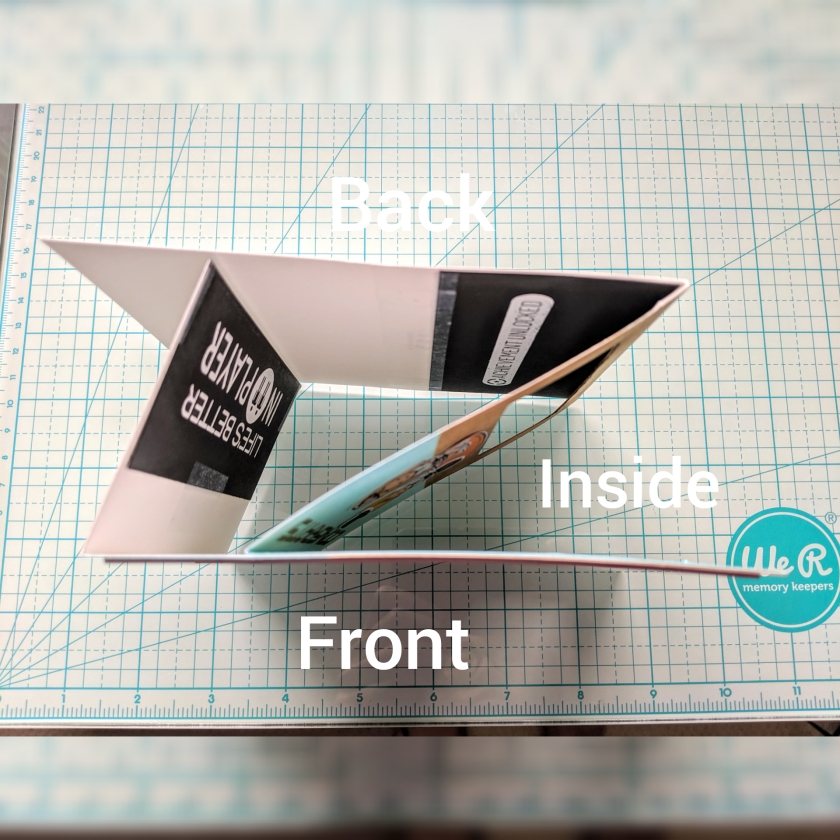
I assembled the card base using Score tape. I started with the back piece and put Score tape on the small flap and adhered it to my inside piece (back side of 3rd die cut window) as if to make a ā€œzā€ shape out of the two pieces. I lined up my windows on the front and inside pieces and adhered them together. The small flap on the front panel gets tucked between the inside and back piece and creates the surprise when you open the card.

I created the scene by creating a background using Distress Inks Gathered Twigs and Tumbled Glass. I masked off each colour so they wouldn’t overlap. I created my front scene by gluing the boy and carpet down to the card front and popping up the exclamation mark and screen with 3M foam tape. I cut 3 MFT Single Stitch Line Rectangle Frames out of 110lb card stock and stacked them on top of each other for my dimension to the card.

I took 2 pieces of black card stock and heat embossed the sentiments, “Achievement unlocked”, and, “Life’s Better In 2 Player”, with WOW Opaque Bright White Embossing Powder. I lined up and adhered, “Achievement Unlocked”, on my back panel and, “Life’s Better In 2 Player”, on the flap of my front panel.

I finished the inside of my card by gluing the characters and carpet down and stamping, “Congrats”, in Recollections Gold Tinsel Embossing Powder. This was also from the Level Up Stamp Set.

You can check out this card in action here:

This card was entered into Simon Says Stamps Monday Challenge here, as well as the 30 Day Colouring Challenge here.

Thanks for stopping by!