Guest Design Post: Craftin Desert Divas Harvest Happiness Card #4

Hey Everybody,

This is my 4th and final guest design post for Craftin Desert Divas using the Harvest Happiness stamp set. If you haven’t seen my intro post to this stamp set you can check it out here. You can also see my second card here and my third card here.

Today, I would like to share more simple card making techniques. In this example, I did a lot of masking. I did use masking paper because I had some on hand but you could also easily use post-it notes. So I would stamp an image, place a mask over top, stamp the next image and so on and so forth.

v1n7P0JCTTWMyZk5tKR92w_thumb_173c

All the images were stamped using Versafine ink.
I haven’t used my Zig Clean Color Real Brush Markers for a while so I wanted to pull them out to get more practice with them. I used them by scribbling them on a slick surface and picking the colour up with a water brush.

I used a corner chomper to round the corners and mounted the panel onto a blue 4.25″x 5.5″ piece of cardstock with strips of 3M foam tape.

That finishes up my guest design post series using the Harvest Happiness Stamp set. Thanks for stopping by!


https://linkdeli.com/widget.js?1505902049622

Craftin Desert Divas Guest Design Post: Harvest Happiness Card 3/4

I’m on a roll!!! This is my third guest design post for Craftin Desert Divas using the Harvest Happiness stamp set. If you haven’t seen my intro post to this stamp set you can check it out here. You can also see my second card here

For this card, I wanted the focus to be on the scarecrow that I haven’t used yet and I wanted it to be a box pop up card. If you are new to my blog, and browse through my previous posts, you’ll see that box pop-up cards are my favourite kind of card to make. I find it way more time consuming but way more gratifying to complete a project.

With this stamp set, I made a simple box pop-up card.

9CobO0h1RxWnRo9OVvq8bA_thumb_1745

If you’re new to box cards and want to try and make one for yourself, you can check out my Youtube video below on how to make a box card base.

f+t8OF6+QX6FWnJKhCan5Q_thumb_1740

Mfitevj2Qve2RBgEbCBTOw_thumb_1741

The patterned paper I used for my box card was from Recollections: Fall At The Park Paper Pack and I used 2 slats in my box card like the video.

I just wanted to create a simple box pop up so I glued all the images down to the slats with my Zig Two Way Glue pen or Scotch Tape. I popped 3 birds up on strips of acetate to make them appear as if they are flying and heat embossed the sentiment, “Sending a little harvest happiness”, in Ranger Superfine White Embossing Powder. On the back of the card, I glued a little cornstalk as a little decorative element.

BXXXxKxgRWy0KuS35yT9Ug_thumb_1748

You can check out this card in action here:

LLxRX96BRbe3XKte26sp5w_thumb_1746

This card was also entered in Simon Says Stamps Wednesday Challenge here.

That’s all from me for now, I’ll be back shortly with my last design post. Thanks for stopping by!


https://linkdeli.com/widget.js?1505997493246

Craftin Desert Divas Guest Design Post: Harvest Happiness Card 2/4

Hey Everyone,

I just wanted to share with you my second guest design post for Craftin Desert Divas using the Harvest Happiness stamp set. If you haven’t seen my intro post to this stamp set you can check it out here.

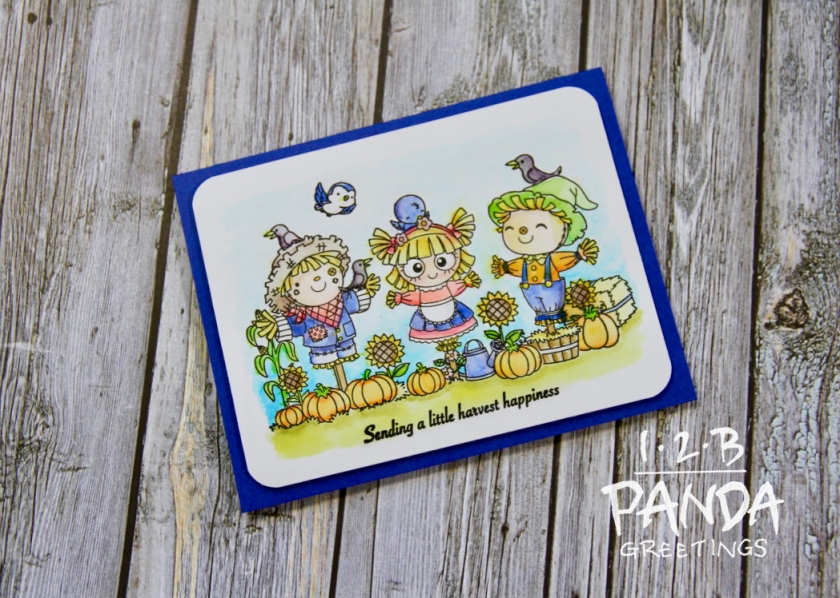
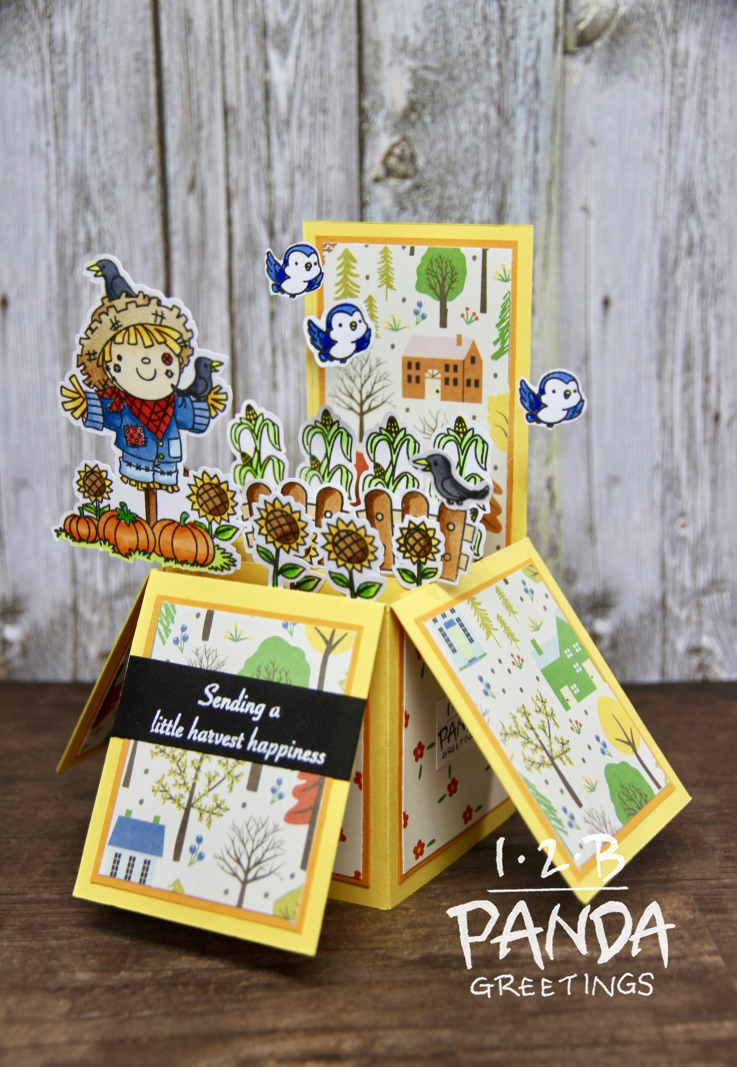
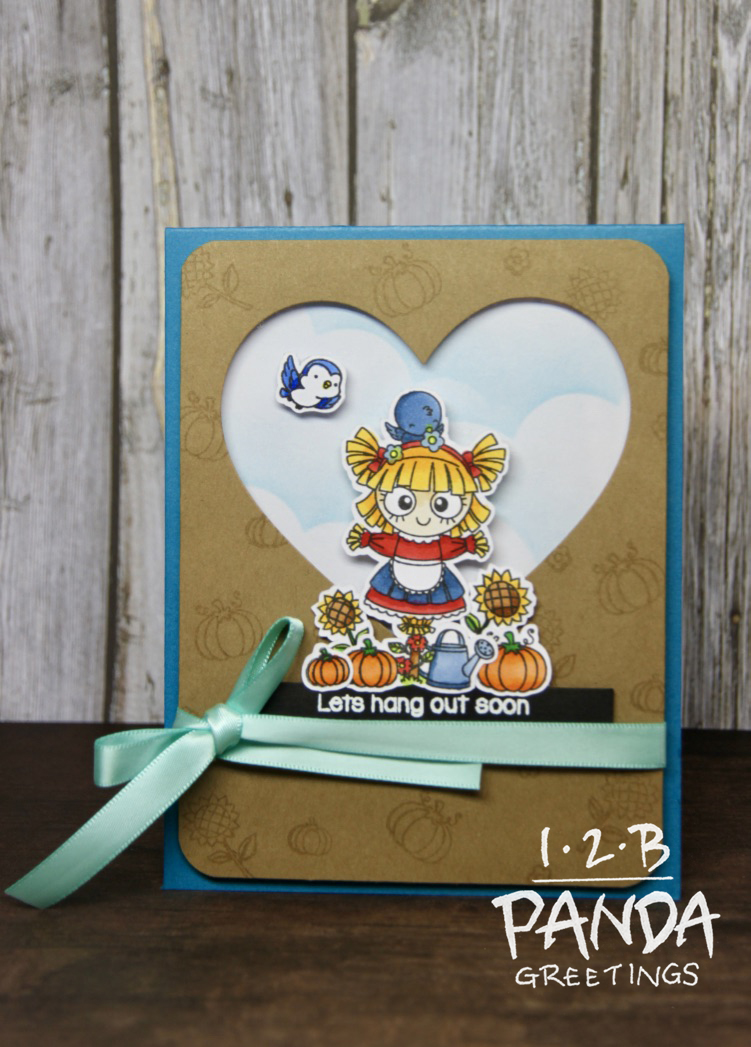
This card is going to focus on the girl scarecrow and I wanted it to be a shaker card. This is what I came up with:

P7ONknbcQJqVuQ62YklfGw_thumb_173f

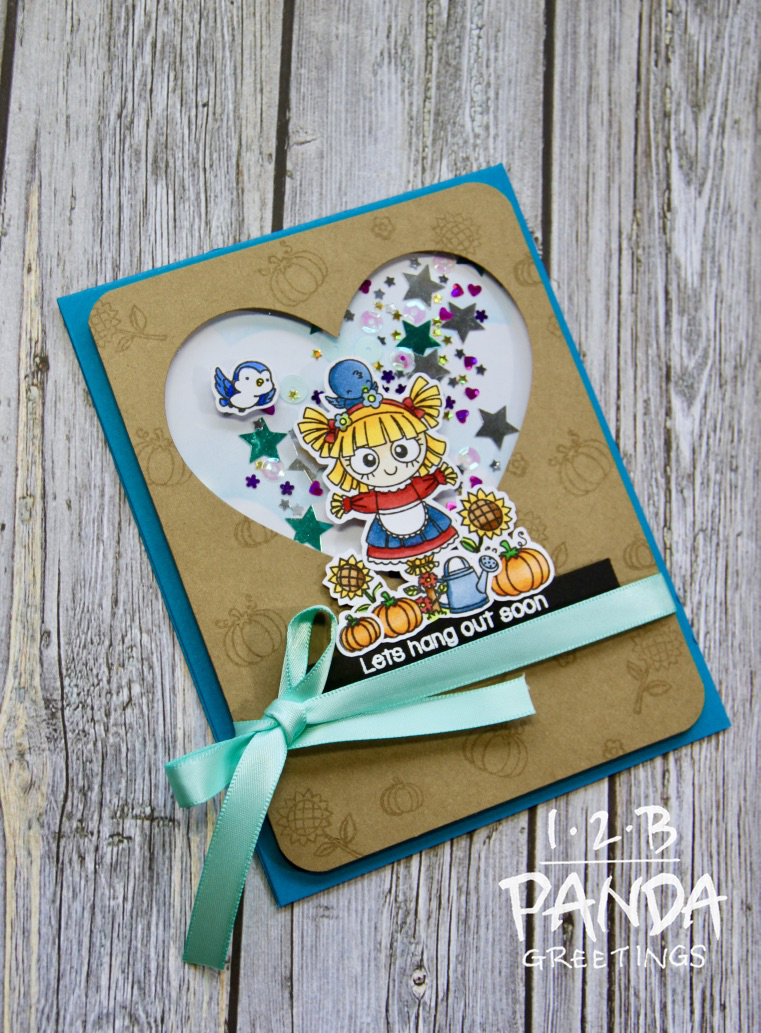
I don’t have any CDD stamps or dies other than this Harvest Happiness stamp set but I didn’t want that small fact to stop me from guest designing. No dies, no problem. I cut a heart out by hand. You know, like the ones you make when you’re little when you fold a piece of paper in half. I cut the heart out of scrap piece of paper then traced it onto my kraft cardstock and cut the heart out by hand using an exacto knife. It’s kind of a slow process but it works. I decorated my kraft cardstock my randomly stamping some of the accessory stamps from the stamp set (sunflowers, pumpkins, and flowers) in Versamark Ink. I wanted the panel to look more feminine so I took a corner chomper to all 4 edges.

For the background, I took a scrap piece of paper and freehand cut a few curves, then stenciled the edge with Tumbled Glass Distress Ink to make a faux cloud border stencil. This is like crafting on the cheap. Like I said, no dies, no problem.

I heat embossed the sentiment, “Lets hang out soon”, in Ranger Super Fine White Embossing Powder and trimmed down my sentiment strip in my Fiskars Paper Trimmer.

The girl scarecrow, sunflowers, pumpkins, and sentiment strip was propped up with 1 layer of 3M foam tape. I glued the small blue bird directly to the acetate shaker window. I have never used ribbon in any of my card designs. Today I’m using ribbon. I wrapped a light green ribbon around the panel and tied a bow. I secured it at the back with some Scotch Tape. To make it into a shaker card, I propped up my card panel with a double layer of 3M foam tape and filled my shaker with a variety of confetti and sequins.

xCY1kk8HTkGmabvIUd8wPQ_thumb_1742

This card was also entered in Simon Says Stamps Wednesday Challenge here.

That finishes up my second guest design post. I’ll be back in a couple days with the third card in my guest design post series.


https://linkdeli.com/widget.js?1505997493246
Close

Guest Design Post: Intro to Craftin Desert Divas Harvest Happiness (Card 1/4)

Hey everybody,

I’m guest designing for Craftin Desert Divas this week and wanted to give you a brief overview of the set and a series of examples. I will be sharing one example today but 3 more will be subsequently posted throughout the week using the same set. Each card will feature each scarecrow and my last card will include all 3. I don’t have any other Craftin Desert Divas stamps or dies so I will be using just this stamp set and simple techniques.

For my first example, I wanted to do a simple watercolour background using Distress inks and “ink smooshing”.

TfbYw0otQ0i73JvDX80WeQ_thumb_1721

You can watch my intro and card process below.

These are the Copic colours I used for colouring the images (in no particular order): B23, B24, B28, E50, E53, Y38, Y35, YR16, YR02, Y21, G07, YG06, E33, E37, C1, C3.

This card was also entered in Simon Says Stamps Wednesday Challenge here.

Thanks for stopping by! I’ll be back soon with another example featuring the girl scarecrow.


https://linkdeli.com/widget.js?1505902049622