MFT Mermazing Shaker Card/ MFT Sketch Challenge #495

It’s been a while since I’ve done an MFT Sketch Challenge. Here’s this week’s Sketch:
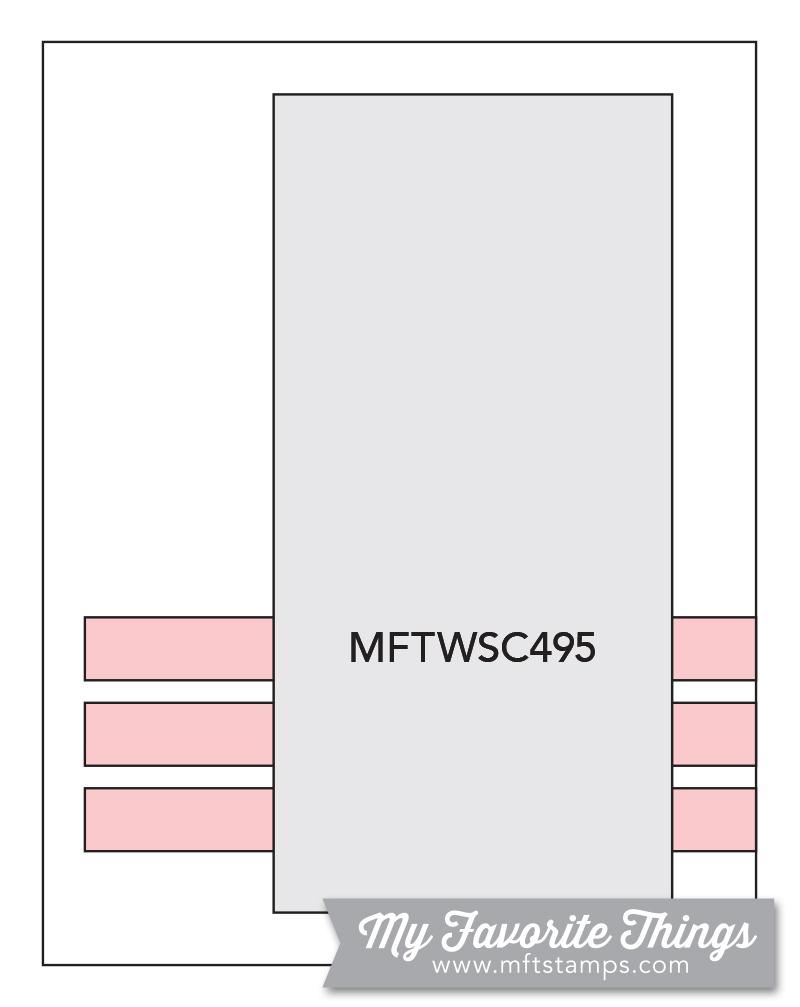
MFT_WSC_495

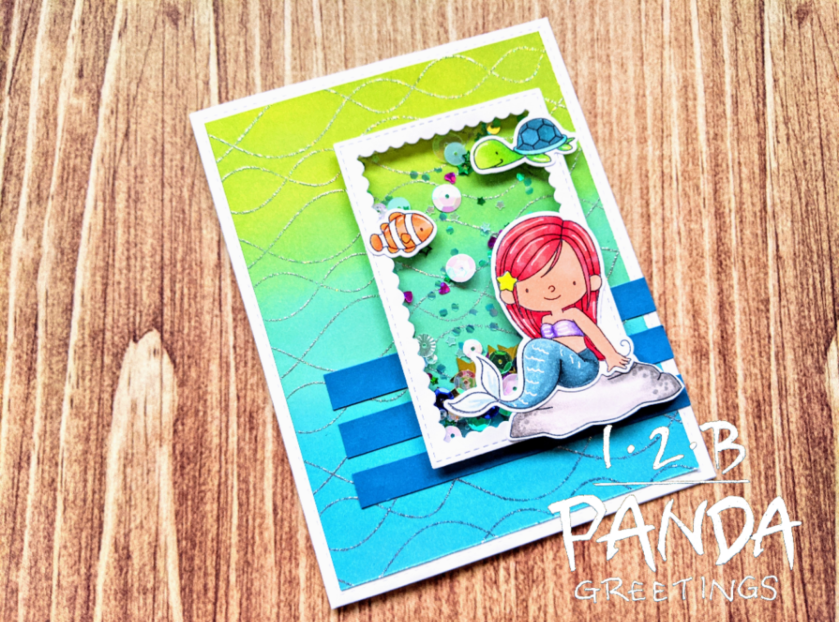
For this sketch I decided to pull out MFT’s Mermazing and Gill Friends Stamp sets.
Screenshot_20200627-154947

I just wanted to keep things simple and used the image of the sitting mermaid, turtle, clown fish, and rock and I stamped them with Hero Arts Intense Black Ink. I used the following Copic Markers:

Rock: W5, W3, W2
Turtle: YG09, YG06, YG03, BG18, BG15, BG13
Fish: YR68, YR16, YR02, C1, 0
Mermaid: R29, R27,R35, R17, E95, E93, E02, Y06, V17, V15, V12, BG78,BG75, BG72, BG70

I also added white highlights with a Sakura Gelly Roll Pen and added Clear Wink of Stella to the mermaid’s fin and starfish hair accessory.

I ink blended the background panel with Distress Oxide Inks Twisted Citron, Cracked Pistachio, and Mermaid Lagoon. I hit it with my heat gun to make sure it was dry before stamping MFT’s Whimsical Waves Background. I heat embossed the background stamp with WOW Cloud Nine Embossing Powder and trimmed down the panel so it was slightly smaller than an A2 size. It’s hard to tell in the photo but the Cloud Nine Embossing Powder is quite glittery and so much prettier in person. I cut a stitched matte using the largest stitched die from Mama Elephant’s Peek A Frames Die set and adhered the ink blended panel to it.

I cut down 3 strips of dark turquoise card stock and glued them to my card base.

I cut the second smallest frame from MFT’s Stitched Rectangle Scallop Frames and created a shaker window with acetate and 3M foam tape. I adhered my images to the window and filled it with a variety of sequins, chunky glitter, and confetti.

That finishes up my card. I hope you all like it! For details of the challenge or if you wanted to enter it for yourself, you can check it out here.

This card was also entered into Simon Says Stamps Wednesday Challenge here.

Thanks for stopping by!
Lawn Fawn Butterfly Kisses Birthday Box Pop Up Card: Lawnfawnatics Challenge #79

I’m in the final count down of days until my due date.

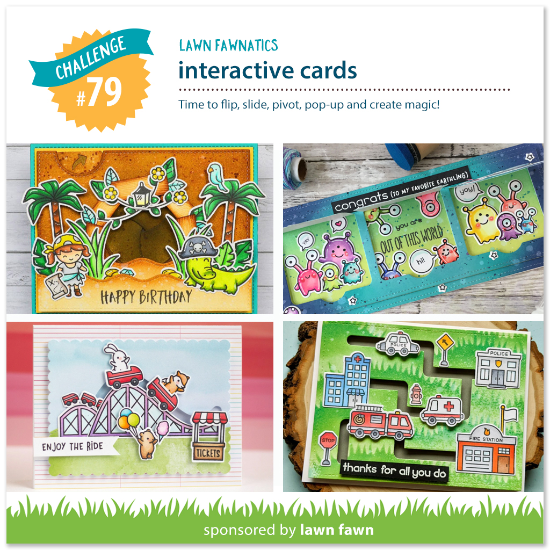
This week’s Lawnfawnatics Challenge is an interactive challenge, which is awesome because I mostly make interactive cards. I’m still trying to use brand new (to me) stuff that’s been sitting on a pile on my desk for like ever, as well as pull out old things from me stash to use more.

79_interactive

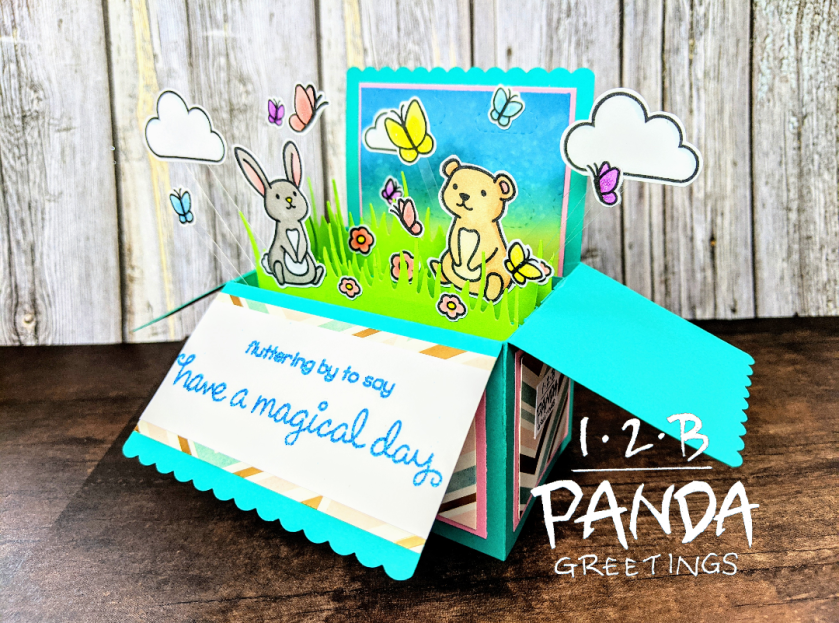
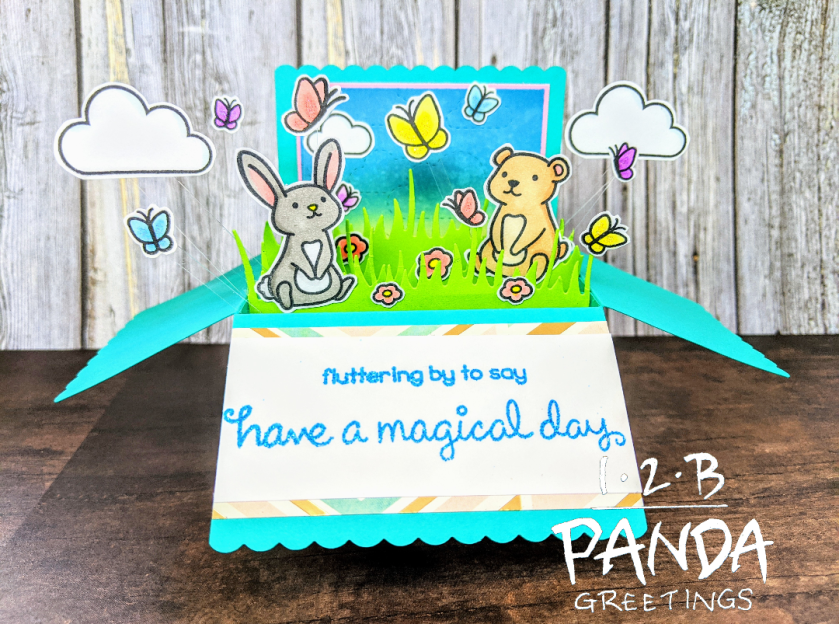
I haven’t used Lawn Fawn’s Scalloped Box Card Pop Up Die in a really long time so I decided to pull it out for this card challenge and create a card using Lawn Fawn’s Butterfly Kisses stamp set.

Screenshot_20200625-151140_2

If you’re unfamiliar with how to use the Scalloped Box Card die, you can check out my Youtube tutorial below:

Screenshot_20200625-151250_2
Front of Card

Screenshot_20200625-151236_2
Back of Card

This card has 4 slats in the box and uses patterned paper from the Craft Smith Mint Pink Paper Pad. I cut the panels instead of using the stitched die included in the die set. I also created mattes for my decorative panels.

Here are the dimensions if you want to do it too:

-Background/ Writing Space Matte: 2 7/8″ x 3 3/4″
-Writing space panel: 2 3/4″ x 3 5/8″
-Panels
-2 11/16″x 1 11/16″ (Bottom right)
-2 11/16″x 1 3/8″ (Top right)
-1 11/16 x 1 11/16″ (need to cut 2 of these: bottom left and back)
-1 11/16″x 1 3/8″ (need to cut 2 of these: top left and back)
-Mattes
-2 7/8″x 1 7/8″ (bottom right)
-2 7/8″x 1 9/16″ (top right)
-1 7/8″x 1 7/8″ (need to cut 2 of these: bottom left and back)
-1 7/8″x 1 9/16″ (need to cut 2 of these: top left and back)

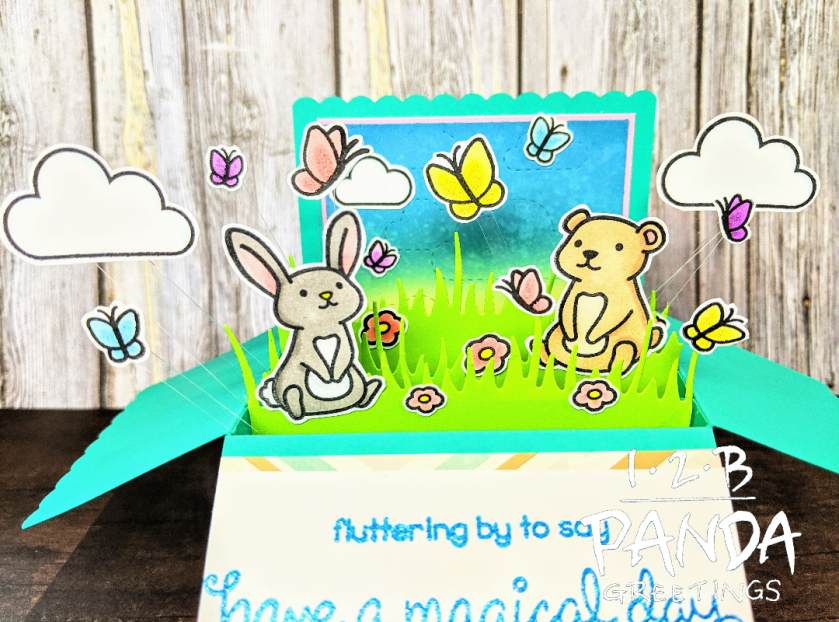
I stamped and fussy cut the images from the Butterfly Kisses stamp set with Lawn Fawn Jet black Ink. I used the following Copic Markers to colour them:

Bear: E33, E31, E41, R22, R20
Rabbit: W5, W3, T1, R20, R22, Y06
Flowers: R20, R22, Y06
Clouds: B000
Butterflies: R20, R22, Y06, Y11, B02, B00, V04, V06, V01 (I also adhered Lawn Fawn Prisma Glitter to the butterflies)

I added stitched cloud details to the background using Lawn Fawn’s Stitched Cloud Backdrop Landscape die and ink blended it with Distress Oxide Inks Squeezed Lemonade, Broken China, and Mermaid Lagoon. I sprayed the panel with water for added interest.

I cut grass panels using Lawn Fawn’s Meadow Border die and adhered them onto the slats. I positioned and adhered all my stamped images in place or onto acetate strips and into the box card using my Zig Two Way Glue Pen and Scotch Tape.

My sentiment, “Fluttering by to say have a magical day”, was from the Butterfly Kisses, as well as the Fairy Friends stamp set. It was glitter embossed with Recollections Marine Tinsel Embossing Powder.

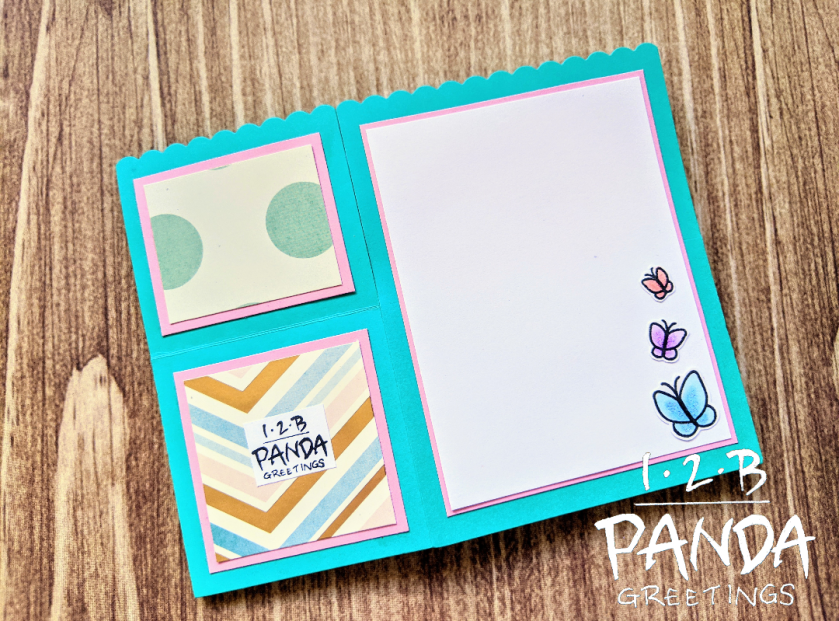
To finish up the card I added a few butterflies to the writing space on the back of the card.

Screenshot_20200625-151216_2

You can check out my card in action here:

Screenshot_20200625-151152_2

If you want to check out this challenge, you can find details here.

This card was also entered into Simon Says Stamps Wednesday Challenge here.

Hopefully this baby comes out soon! I hope you guys like my card. Thanks for stopping by!

MFT Birthday Chicks Birthday Box Pop Up Card

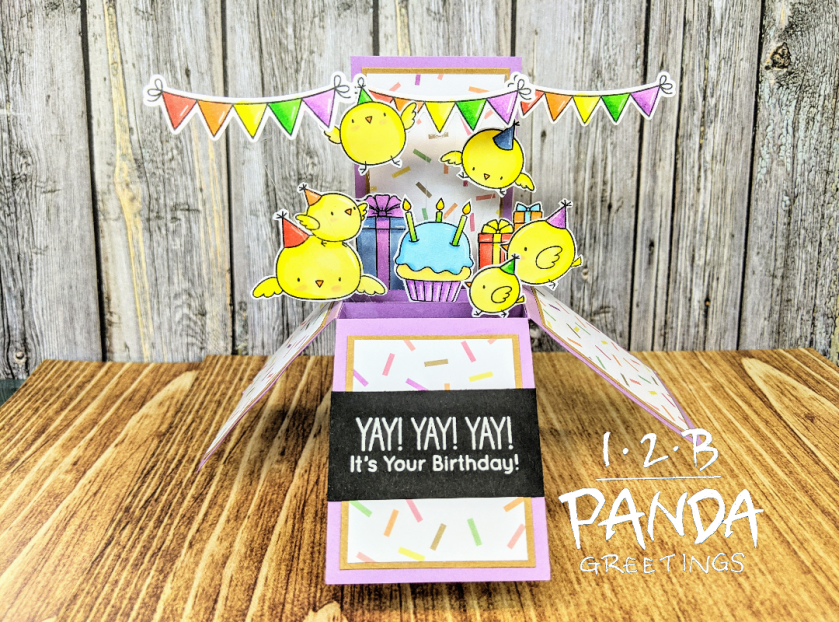
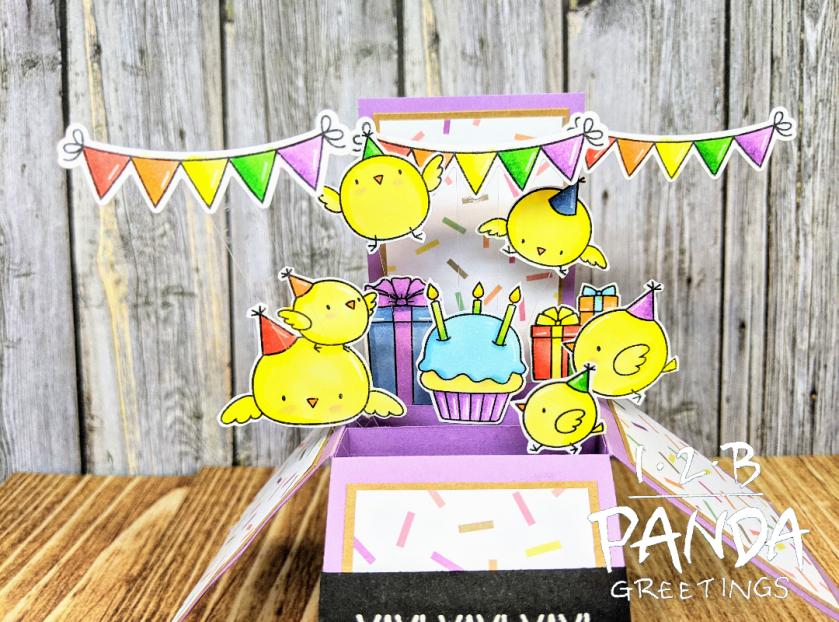
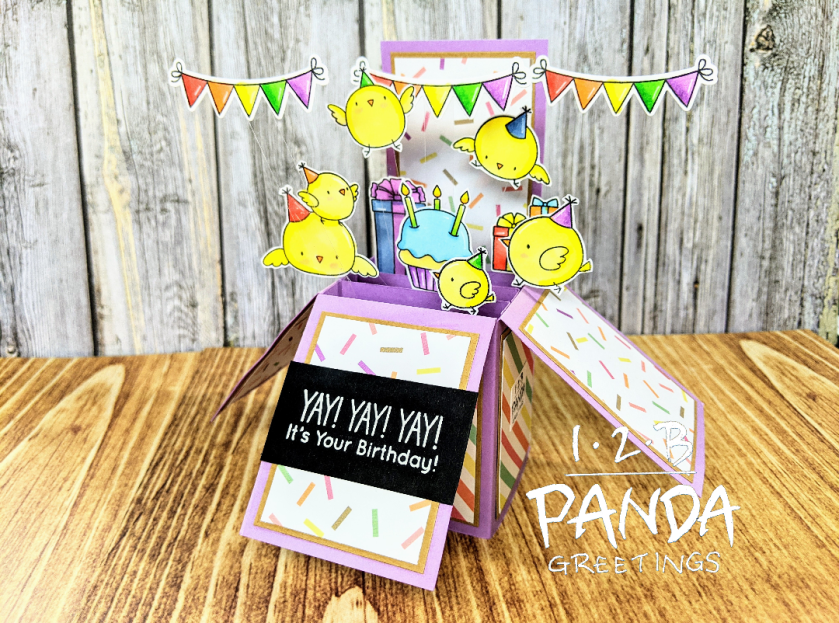
I’m still slowly working through stamp sets in my to-use pile. Today I’ll be using MFT’s Birthday Chicks stamp set. It’s a cute Birdie Brown stamp set that features a bunch of chicks celebrating a birthday! I thought the images paired nicely with stamps from MFT’s Beary Special Birthday, Up in the Air, and Sweet Birthday Wishes. This is what I came up with:

Screenshot_20200415-200356_2

If you’re unfamiliar with box cards, you can check out my box card base tutorial below:

Screenshot_20200415-200435_2
Front of Card

Screenshot_20200415-200412_2
Back of Card

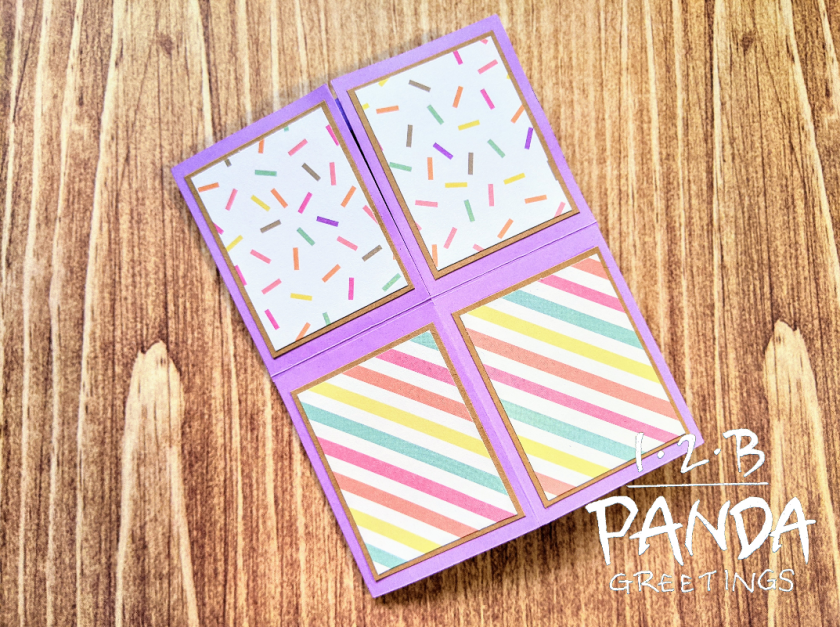
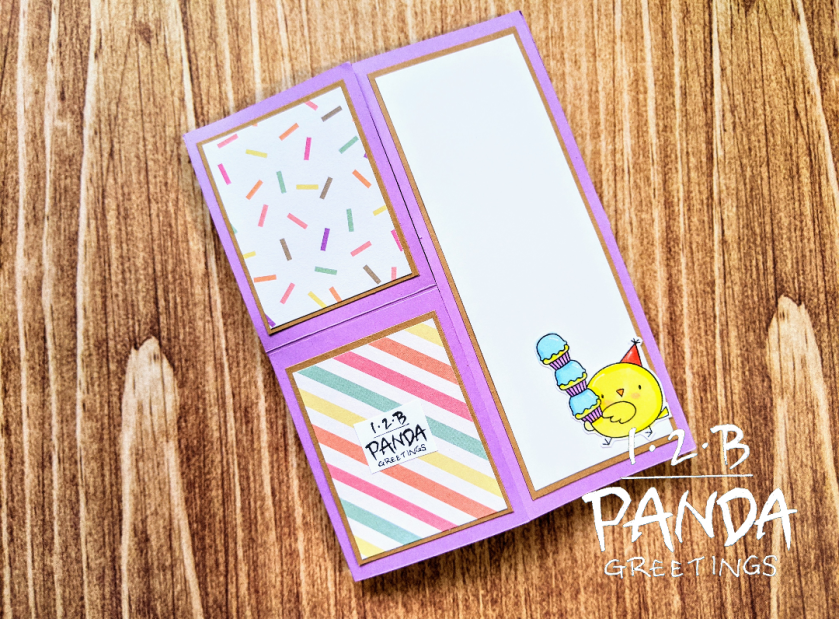
There are 3 slats in this box to start and this box features decorative paper from DCWV Confetti Paper Pad.

I started out the card by stamping out the images with Hero Arts Intense Black Ink and fussy cutting the images with my Cutterbee Scissors. I used the present trio image from the Beary Special Stamp set, the banners from Up in the Air, and the big present from Sweet Birthday Wishes. I used the following Copic Markers to colour them: R17, R14, R20, YR04, YR02, Y06, Y11, YG09, YG06, YG03, B02, B00, B95, B93, V15, and V12. I also made highlights with a white gel pen. I used Lawn Fawn’s Glitter Pen to fill in the banner, candles, and party hats.

I adhered the images directly to the slats or onto acetate strips and tabs and onto the slats.

I heat embossed the sentiment, “YAY! YAY! YAY! It’s Your Birthday!”, with Brutus Monroe Alabaster White Embossing Powder.

Screenshot_20200415-200327_2

You can check out the card in action below:

Screenshot_20200415-200242_2

Thanks so much for stopping by!

This card was also entered into Simon Says Stamps
Monday Challenge and the 30 day colouring challenge here.

Lawn Fawn Really High Five Birthday Slider Card (Lawn Fawnatics Challenge #75)

Today I just wanted to share a quick simple slider card that I created for Lawnfawnatics current challenge: Spectacular Skies.

75

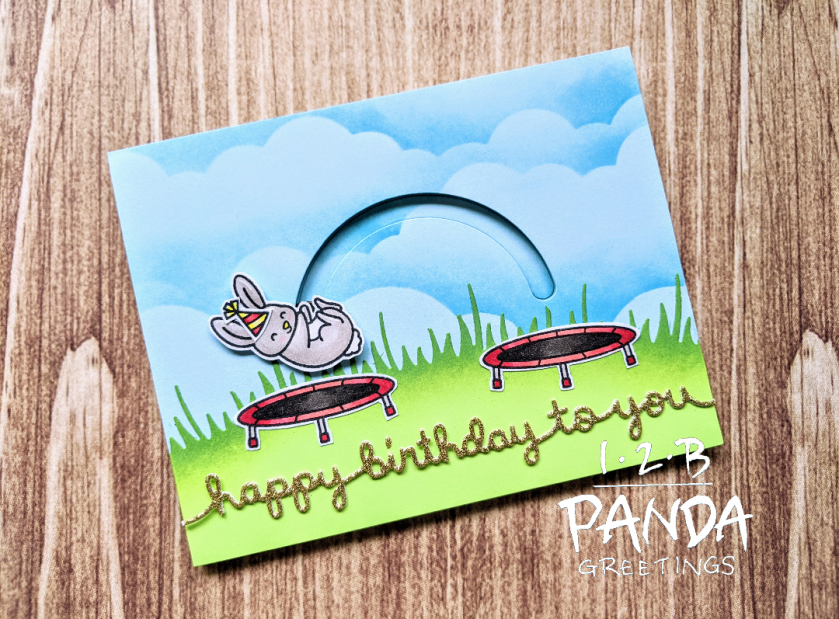
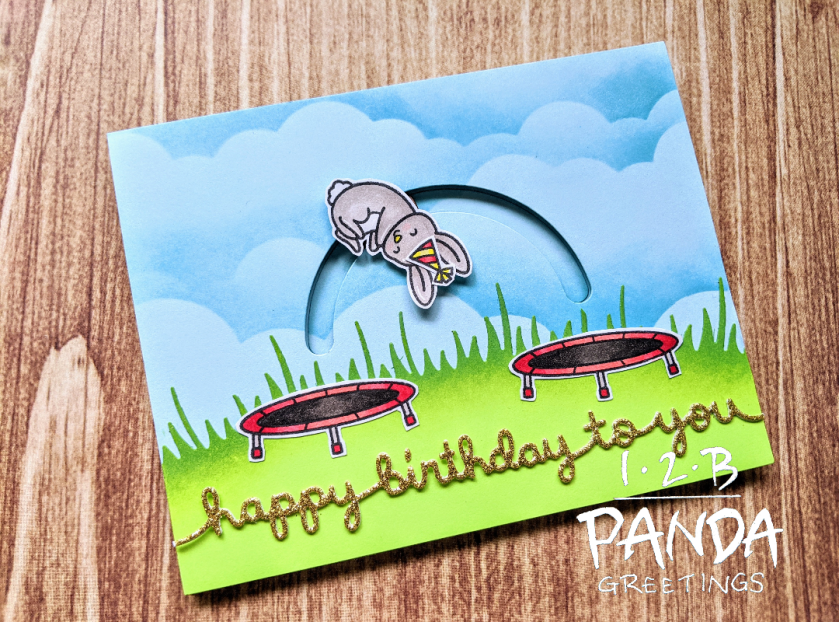
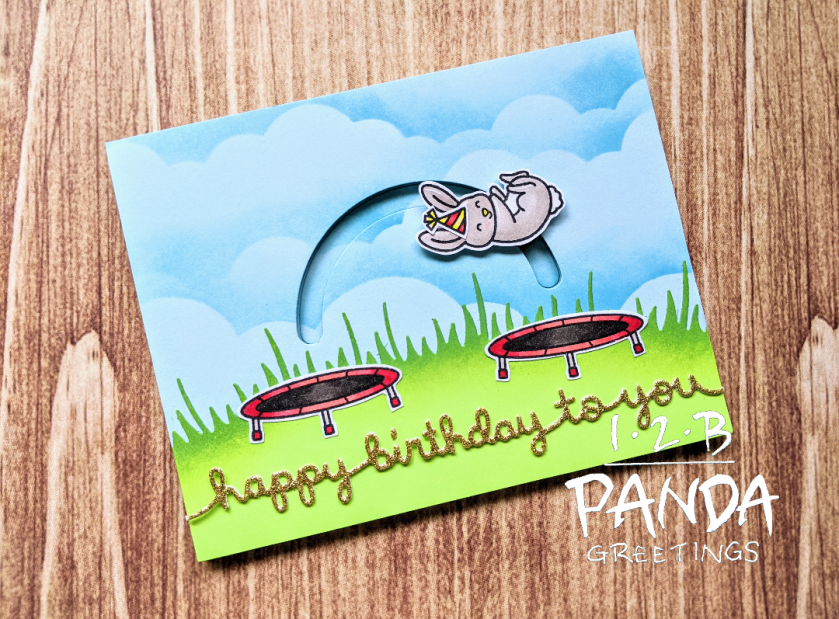
I wanted to use Lawn Fawn’s Really High Five stamp set. The bunny in the set is absolutely adorable and I thought it would be fun to create a slider card as if the bunny was jumping between two trampolines.

Screenshot_20200415-200617_2

Screenshot_20200415-200600_2

Screenshot_20200415-200523_2

I started by stamping the images with Lawn Fawn Jet Black Ink and colouring them with my Copic Markers. I used the following markers: W0, W2, W3, W5, W7, W9, R29, R35, R14, R20, 0, Y06, and Y11.

I cut down a piece of light blue A2 sized card stock and I wanted to do some ink blending. I used Lawn Fawn’s Puffy Cloud Borders and cut 2 borders using some scrap card stock to use a stencil for the background. I ink blended the cloud border with Distress Oxide Ink Broken China.

I cut a grassy edge using Lawn Fawn’s Meadow Borders and ink blended with Distress Oxide Ink Mowed Lawn to create a little bit of depth.

I die cut a semi circle sliding channel from Lawn Fawn’s Slide Over Semicircle Dies into the cloud panel. I took another piece of light blue card stock and lined the 2 pieces up and glued the inside of the slider channel to the second piece of card stock.

I die cut the sentiment, “happy birthday to you”, using Lawn Fawn’s Happy Birthday Border twice- once out of 110lb white card stock and once out of a gold glitter card stock and I adhered them together.

I adhered all my pieces to my card and popped my bunny into the sliding channel using a piece of round foam adhesive and a penny. On the back of the panel, I did a double layer of foam adhesive so that there was space for the penny to slide. I adhered it down to the second piece of blue card stock and onto a white card base.

You can check out the card in action below:

That finishes up my card, if you want to join in on the fun, you can check out the details of Lawn Fawnatics Challenge here.

This card was also entered into the 30 day colouring challenge
here and Simon Says Stamps
Monday Challenge.

I also made a pop up card using the same stamp set. If you want to check it out you can find it
here.

Mama Elephant Little Fairy Agenda Wiper Card

Hey Everybody!!!

The 30 Day Colouring Challenge is actually going on right now again. I had originally stamped the Mama Elephant Wild Meadow Stamp to practice colouring with my Zig Clean Colour Real Brush Markers, which lead to the making of my FIRST WIPER CARD!!

challenge_graphic_april_may_20_650

I bought Mama Elephant’s Wiper Surprise Die late last year and I’ve been really itching to try and figure it out. When I saw the demos on Youtube I didn’t really get how it worked and figured that I really just needed to sit down and play with the mechanism.

This is what I came up with:

Screenshot_20200415-200506_2

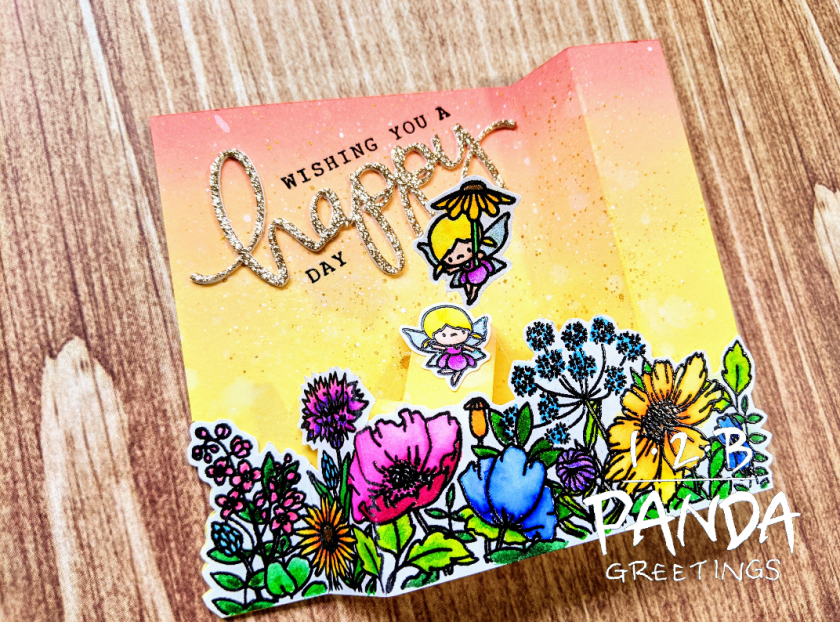
The floral Wild Meadow Stamp and two of the fairies from Mama Elephant’s Little Fairy Agenda were stamped with Versafine and heat embossed with WOW Clear Gloss Embossing Powder on 140lbs watercolour paper. In no particular order, I use the following Zig Clear Color Real Brush Markers and a water brush to colour the images:

-Faires: 051 Lemon Yellow, 050 Yellow, 052 Bright Yellow, 082 Purple, 069 Blush, 083 Lilac, 303 Shadow Mauve, 004 FL. Green, 071 Flesh Color, 065 Mid Brown. I also used Lawn Fawn Prisma Glitter on the fairy wings.
-Flowers: 260 Deep Red, 027 Dark Pink, 202 Peach Pink, 026 Light Pink, 070 Orange, 052 Bright Yellow, 050 Yellow, 051 Lemon Yellow, 053 Yellow Green, 044 Deep Green, 047 May Green, 048 Emerald Green, 030 Blue, 031 Cobalt Blue, 036 Light Blue, 081 Light Violet, 080 Violet, and 056 Mid Brown

I die cut pieces for the wiper card out of the same watercolor paper. I fussy cut the images out with my Cutterbee Scissors and trimmed the panel to match the length of the floral image.

I ink blended the wiper panel with Distress Oxide Inks Squeezed Lemonade, Dried Marigold, and Abandoned Coral. I sprayed the panel with water and spattered it with diluted Copic Opaque White and Arabic Gold from my Finetec palette.

I assembled the wiper card using Score Tape. After assembling the mechanism, I realized that the right sided fairy kept catching on the floral border so I cut the wiper mechanism and added a strip of acetate.

To finish up the card I die cut Mama Elephant’s Happy Script die twice out of 110lb white card stock and once out of a warm gold glitter card stock and adhered them together. I stamped, “Wishing you a”, and ,”Day”, before and after the happy script using Mama Elephant’s Happy Everything Stamp set in Versafine and heat embossed with WOW Clear Gloss Embossing Powder.

You can check it out in action here:

That finishes up my card, I hope you guys liked it. If you want to join in on the fun, you can check out the details of the 30 day colouring challenge
here. This card was also entered into Simon Says Stamps
Monday Challenge.

Thanks for stopping by!

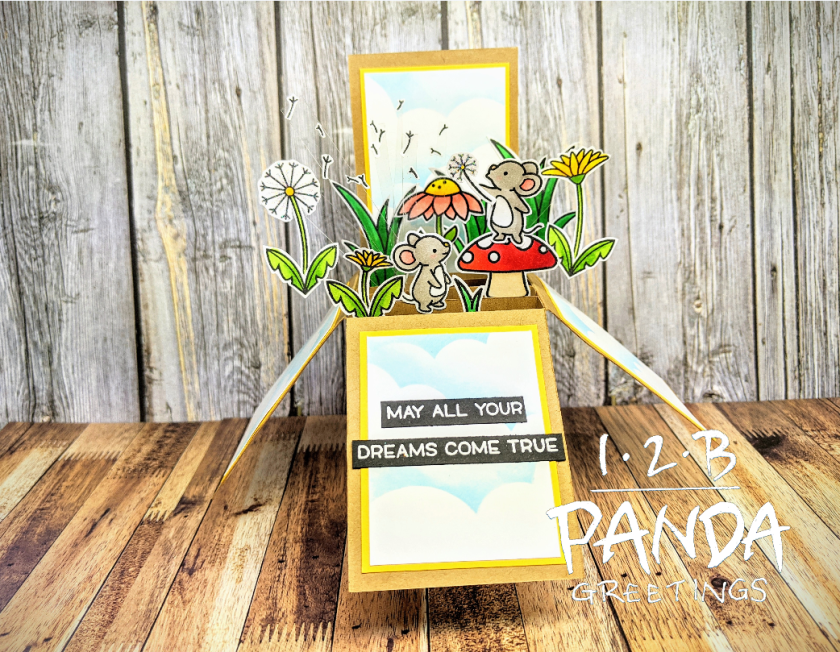
Lawn Fawn Dandy Days Birthday Box Pop Up Card (Lawnfawnatics Challenge #73)

Hey Everybody,

Covid 19 has created some odd times these days. I hope social distancing is treating everybody well. Thankfully, card making can be both a social and solo activity. I’m here today with my last entry for Lawnfawnatics current challenge.

73-lawn-fawnatics-birthday

If you’ve been following along, you’ve already read that it’s Lawn Fawn’s 10th birthday and that this challenge is going on for 3 weeks instead of the usual 2! I recently acquired a couple stamp sets from Lawn Fawn’s current release and felt like it would be appropriate to use them for this birthday challenge. This is what I came up with:

Screenshot_20200403-155543_2

If you’re unfamiliar with box cards, you can check out my box card base tutorial below:

Screenshot_20200403-155509_2
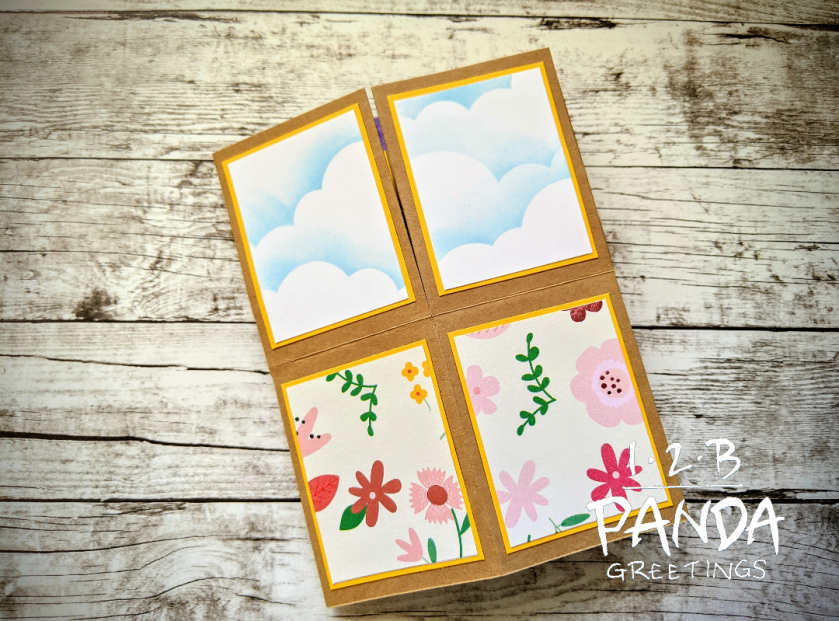
Front of Card

Screenshot_20200403-155526_2
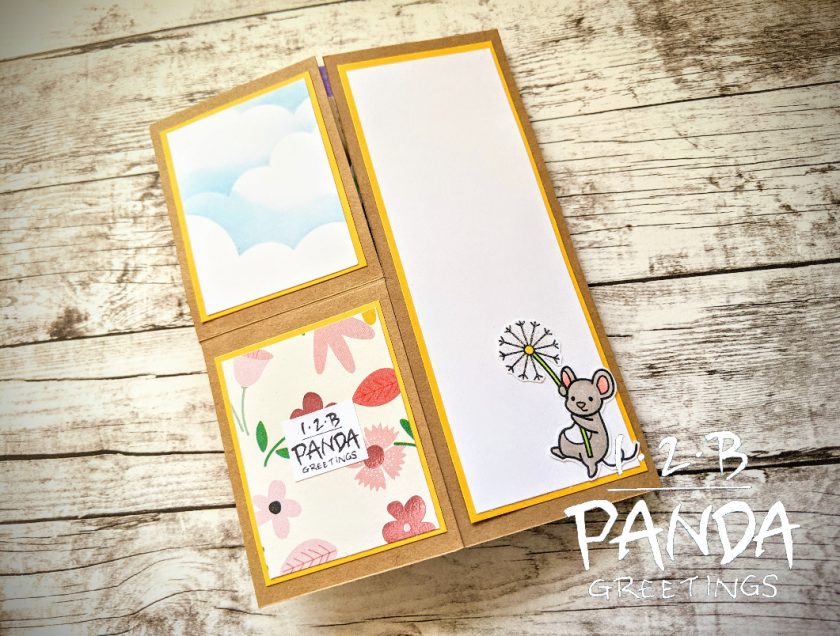
Back of Card

I used patterned paper from Recollections Sweet Baby Girl paper pad, as well as, I ink blended clouds with MFT’s Cloud Stencil and Distress Oxide Tumbled Glass. There are 4 slats in the box card to start.

I stamped out the images from Lawn Fawn’s Dandy Days, Gleeful Gardens, and Oh Gnome Stamp Sets with Lawn Fawn Jet Black Ink and fussy cut them with my Cutterbee Scissors. I used the following Copic Markers to colour them:

Mice: W3, W2, W0, 0, R22, R20, E43
Mushroom: E43, E42, E41, R46, R27, R35, R17
Flower: R20, R22, Y17, Y15, Y06, YG17, YG13
Dandelion: Y17, Y15, Y06, YG17, YG13
Grass: G07, G05, G02

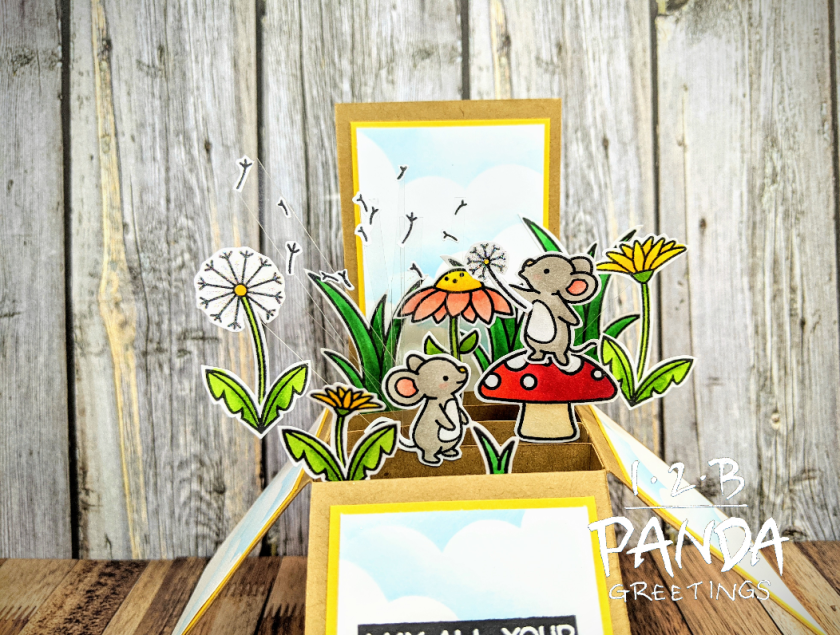
I applied Lawn Fawn Prisma Glitter to the Dandelion fluffs and used a Lawn Fawn Glitter Pen on the flowers. All the stamped images were glued directly onto the slats of the box card or onto strips of acetate.

The sentiment, “May all your dreams come true”, was heat embossed with Brutus Monroe Alabaster White Embossing Powder.

Screenshot_20200403-155603_2

You can check out the card in action here:

This card was also entered into Simon Says Stamps
Monday Challenge and Wednesday Challenge.

Check out my other entries for this challenge using Lawn Fawn’s Big Thanks For Hero Arts stamp set and Really High Five stamp set.

Thanks for stopping by! Stay Safe!

Lawn Fawn Really High Five Birthday Box Pop Up Card (Lawnfawnatics Challenge Entry #73)

Hi Everybody,

I’m back with another entry for Lawnfawnatics current card making challenge.
73-lawn-fawnatics-birthday

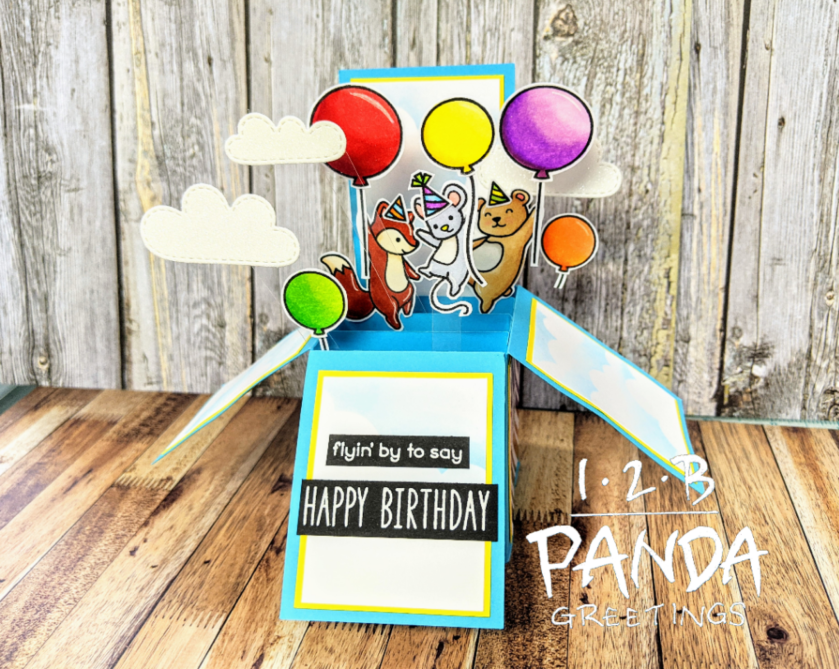
Unlike previous challenges, this one is going on for 3 weeks so there is plenty of time to make a project. I bought two stamp sets from Lawn Fawn’s most recent release so I was keen to use one of those. I would ideally like to use both of them for this challenge so you guys might see another pop up card later this week if I have time to create it. First up, I decided to use Lawn Fawn’s Really High Five stamp set. This is what I came up with:

Screenshot_20200401-160540

If you’re unfamiliar with box cards, you can check out my box card base tutorial below:

Screenshot_20200401-155733_2
Front of Card

Screenshot_20200401-155753_2
Back of Card

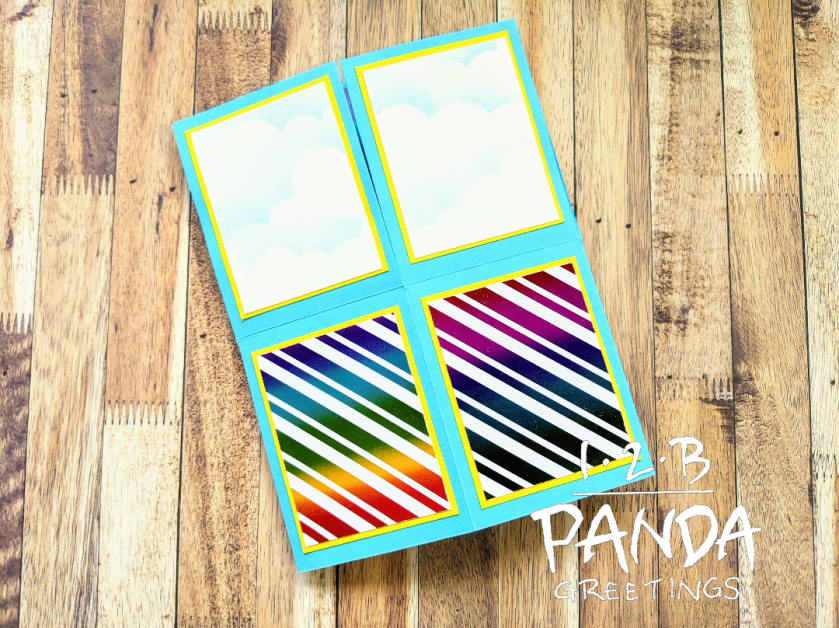
This card has 3 slats in the box to start and used patterned paper from Recollections Rainbow Everything Paper Pad, as well as, cloud patterns created with MFT’s Mini Cloud Edge Stencil and Tumbled Glass Distress Oxide Ink.

I stamped images from the Really High Five stamp set with Lawn fawn Jet Black Ink and fussy cut the images using my Cutterbee Scissors. I used the following Copic Markers.

Mouse: C3, C1, W2, W0, Y06, R22, R20
Bear: E33, E31, W0, W02, R20, R22
Fox: E08, E07, E53, E50, R22
Balloons: R29, R27, R35, YR07, YR04, YR02, Y08, Y06, Y11, YG09, YG06, YG03, V06, V04, V01
Party Hats: B02, B00, YG06, YG03, V04, V01, YR04, YR02, Y06, Y08

I die cut clouds from Lawn Fawn’s Spring Showers Lawn Cuts out of some white glitter paper and adhered them and my stamped images into my box card. some of the images are adhered directly onto the slats while some are adhered onto strips of acetate.

I used Lawn Fawn’s Glitter Pen on all the balloons to add a bit more shimmer to the card. If you’re looking on the market for a glitter pen, I DO definitely recommend this one. Unlike the Spectrum Noir Clear Overlay Brush Pen or the Clear Wink of Stella, once it dries on your project, the glitter doesn’t rub off with your finger. I really do like just having to apply it once and after a bit of handling, know that the glitter is still present.

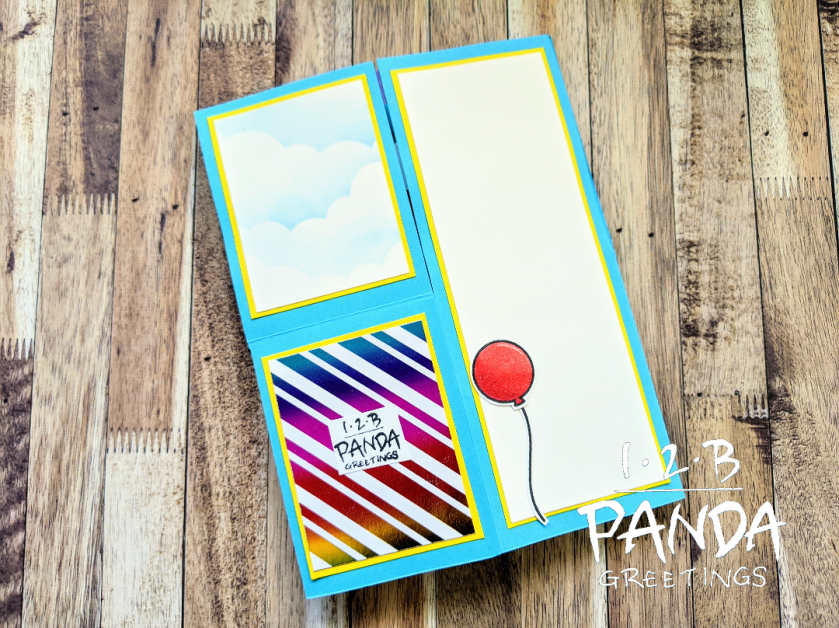
I finished up the card by heat embossing the sentiment, “flyin’ by to say happy birthday”, with Brutus Monroe Alabaster White Embossing Powder. I also glued another balloon to the back of the card where the writing space is.

You can check it out in action here:

So that finishes up my card. If you want to check out this challenge for yourself, you can find it here.

This card was also entered into the 30 Day colouring challenge (except I’m a day late >_<)
here and Simon Says Stamps Wednesday Challenge here.

Thanks for stopping by!
Lawn Fawn Big Thanks for Hero Arts Birthday Box Pop Up Card

I’m finally getting back into the swing of card making again after my first trimester hiatus and I have an overwhelming number of things on my desk that I need to use due to Black Friday, Christmas, and Boxing Day sales. A great motivation for me to really get back into card making is the Daily Marker 30 Day Colouring Challenge. Realistically, you just have to spend a few minutes a day colouring but I’d rather just share my finished card!

challenge_graphic_march_20_650

If you want to join in on the fun, you can check out the details
here.

Also, I’m making this card for the current Lawnfawnatics Challenge. Lawn Fawn is celebrating its 10th birthday so this weeks challenge theme is birthdays!

73-lawn-fawnatics-birthday

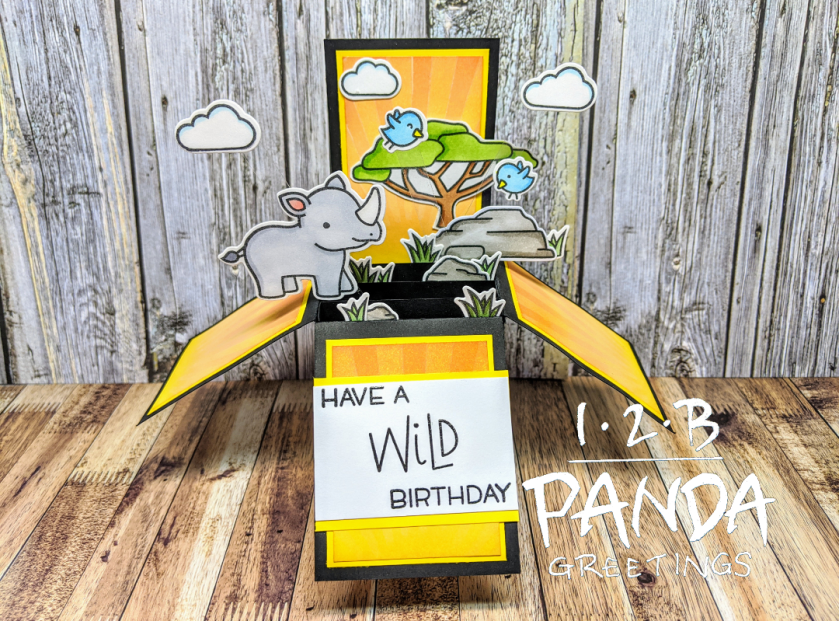
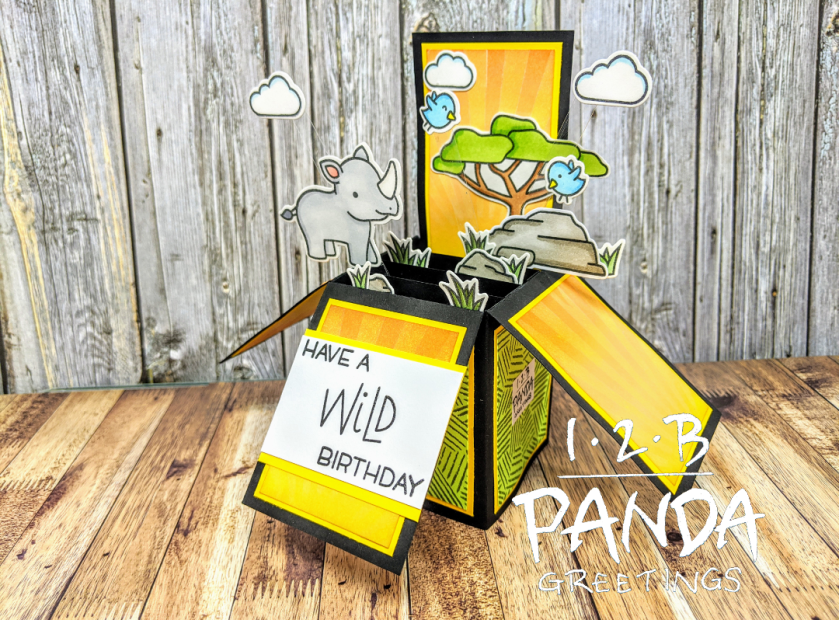
Hero Arts had their 45th Year Anniversary September of last year and released a an adorable rhino collaborative stamp set with Lawn Fawn. This is what I came up with:

Screenshot_20200312-161454_2

I started out this card by stamping some of the images from the Big Thanks stamp set, as well as the tree from Critters On The Savanna stamp set, and the large rock from Mermaid For You.

I used the following Copic Markers:
Rhino: C5, C3, C1, W0, R22, R20, 0
Clouds: B00, 0
Rocks: W5, W3
Tree: E37, E33, YG17, YG13
Grass: G99, G94, G24, G21
Birds: B02, B00, Y06

If you’re unfamiliar with box cards, you can check out my box card base tutorial below:

Screenshot_20200312-161510_2
Front of Card

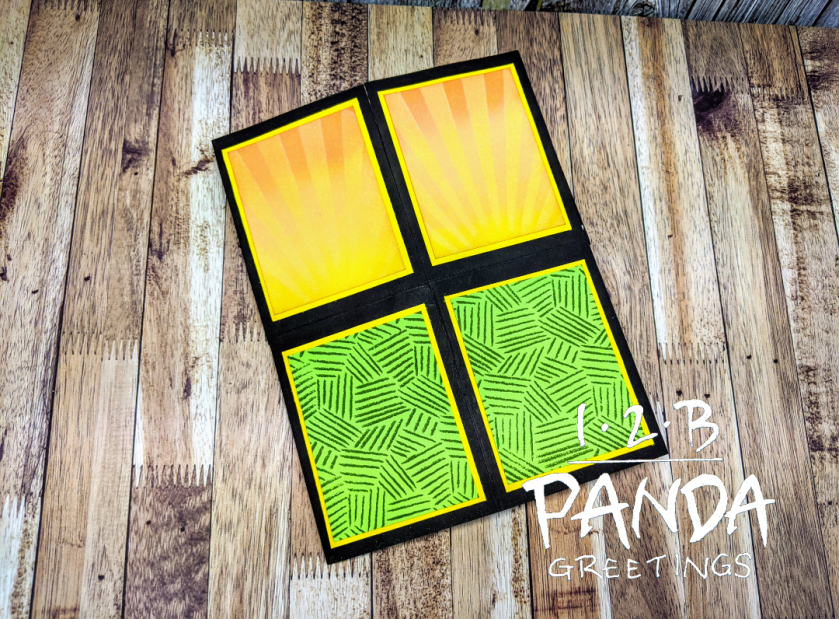
Screenshot_20200312-161503_2
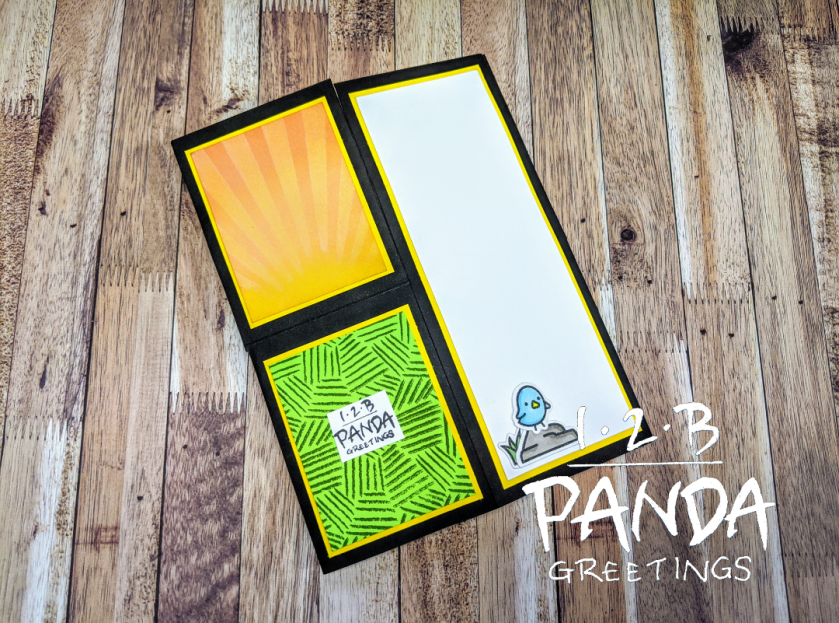
Back of Card

This card has 3 slats. The green panels were stamped with MFT’s Cactus Dye Ink using MFT’s Etched Tribal Background Stamp. The yellow panels were ink blended with Distress Oxide Inks Carved Pumpkin, Dried Marigold, and Mustard Seed. Then I used MFT’s Radiating Rays Stencil and Squeezed Lemonade Distress Oxide Ink to create the sun rays.

I assembled the interior of my card by gluing the pieces directly to the slats or adhering them onto card stock or acetate tabs and gluing them to the slats.

For my sentiment, I used, “Have A Wild Birthday”, from the Lawn Fawn Wild For You Stamp set. It was stamped with Versafine Ink and heat embossed with WOW Clear Gloss Embossing Powder.

I finished up the card by adding a bird, rock, and grass to the writing space on the back.

Screenshot_20200312-161444_2

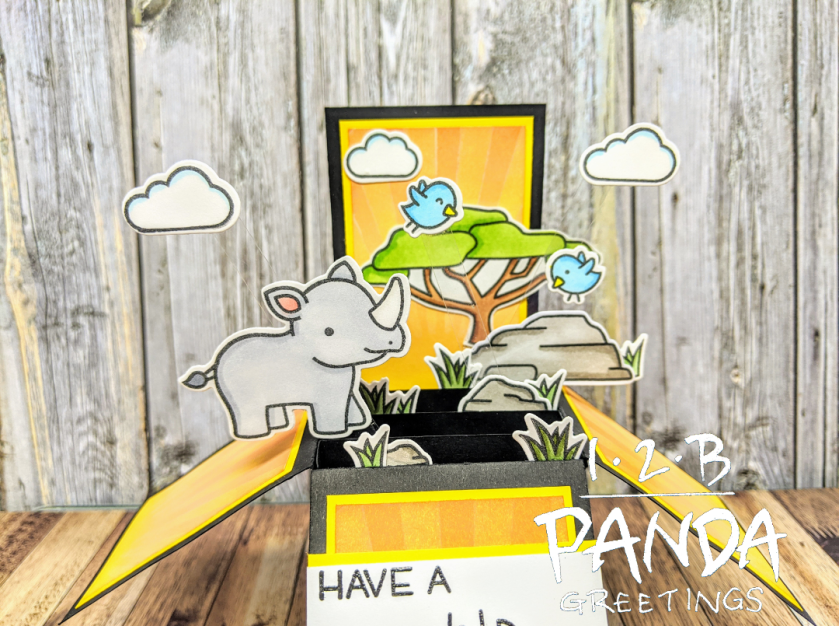
You can check it out in action here:

Screenshot_20200312-161430_2

This card was also entered into Simon Says Stamps Monday Challenge and Wednesday Challenge.

Thanks for stopping by!
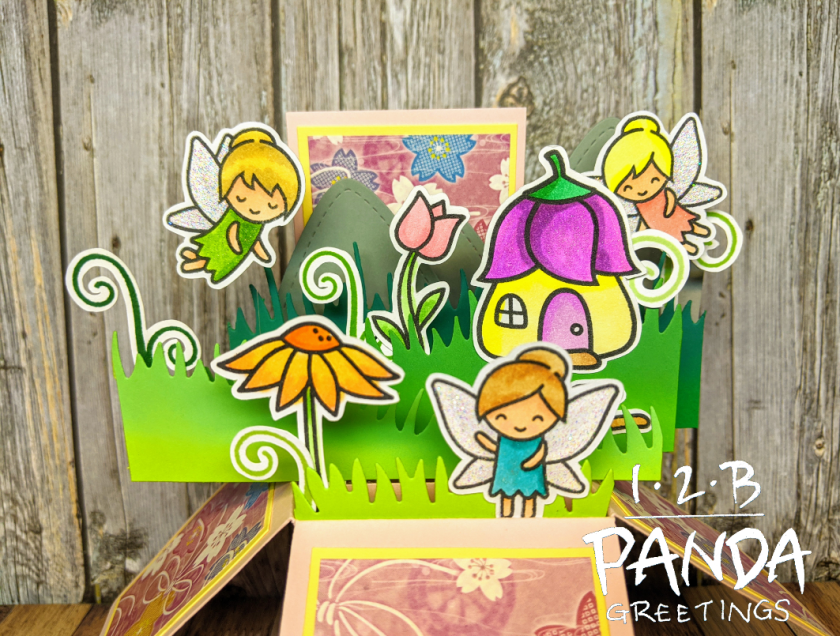
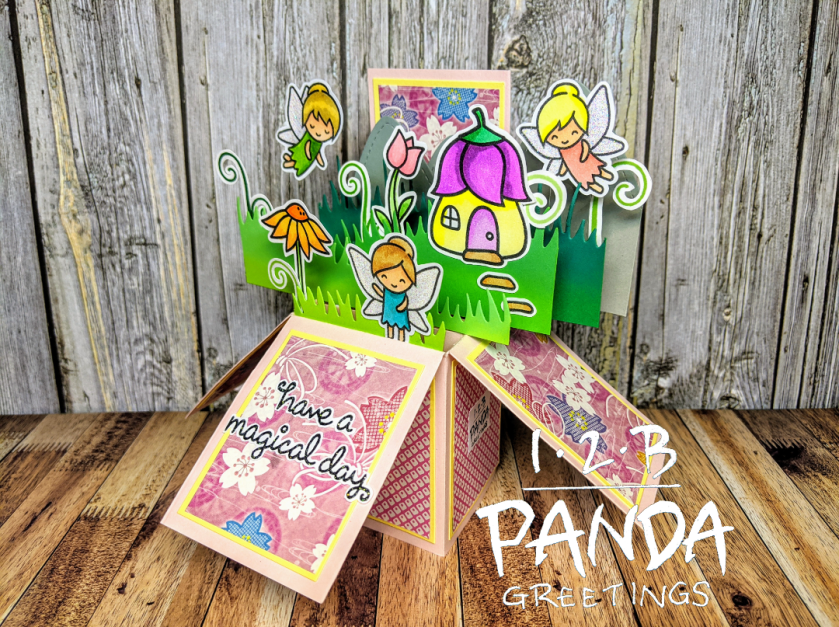
Lawn Fawnatics Challenge #72: Lawn Fawn Fairy Friends Birthday Box Pop Up Card

I’ve had Lawn Fawn’s Fairy Friends Stamp set for like EVER!! It’s finally time to use it. It’s also been a while since I did a card for a Lawn Fawntatics Challenge. The current challenge is to design a card inspired by a book, movie, or song.

72badge

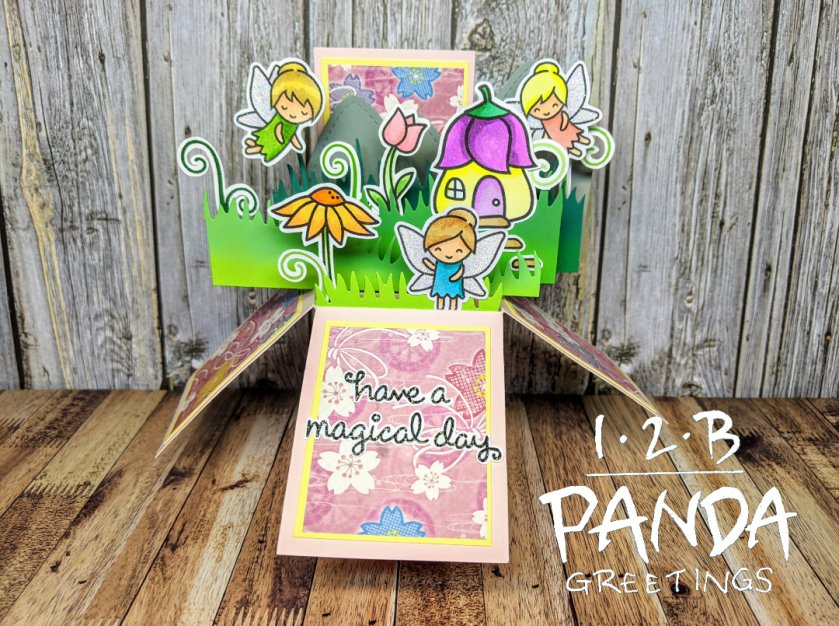
I took inspiration from Tinkerbell. This is what I came up with:

Screenshot_20200306-164001_2

I stamped images from the Fairy Friends Stamp set with Lawn Fawn Jet Black Ink and coloured them with Copic Markers. I used the following markers: YG13, YG17, C1, 0, E95, YR00, Y28, Y21, BG45, BG49, Y06, Y11, R22, R20, E33, E31, V06, V04, G05, G02, YG06, YG11, RV23, RV21, YR07, YR04, Y38, and Y35.

I also stamped the long grasses using the Lawn Fawn inks Celery Stick, Freshly Cut Grass, Jalapeno, and Noble Fir.

I LOVE Lawn Fawn Prisma Glitter so I applied it to the fairy wings. I also used a Lawn Fawn Glitter Pen and applied it to the fairy dresses and all the flowers. This Lawn Fawn Glitter Pen is really growing on me and I find myself reaching for it more! It’s a felt tip glitter pen and yields a fine white shimmer, similar to the Spectrum Noir Clear Overlay Brush Pen. What I LOVE about it though, is that when it’s dry, the glitter does not rub off unlike the Spectrum Noir Pen or the Clear Wink of Stella.

I die cut mountains using Lawn Fawn’s Stitched Mountain Border and grassy hills using Lawn Fawn’s Grassy Hillside Borders and Meadow Borders. I created more depth by ink blending the top of each piece. For the mountains I used Distress Oxide Iced Spruce, and for the grass I used Distress Oxide Pine Needles, Mowed Lawn, and Cracked Pistachio.

If you’re unfamiliar with box cards, you can check out my box card base tutorial below:

Screenshot_20200306-164047_2
Front of Card

Screenshot_20200306-164036_2
Back of Card

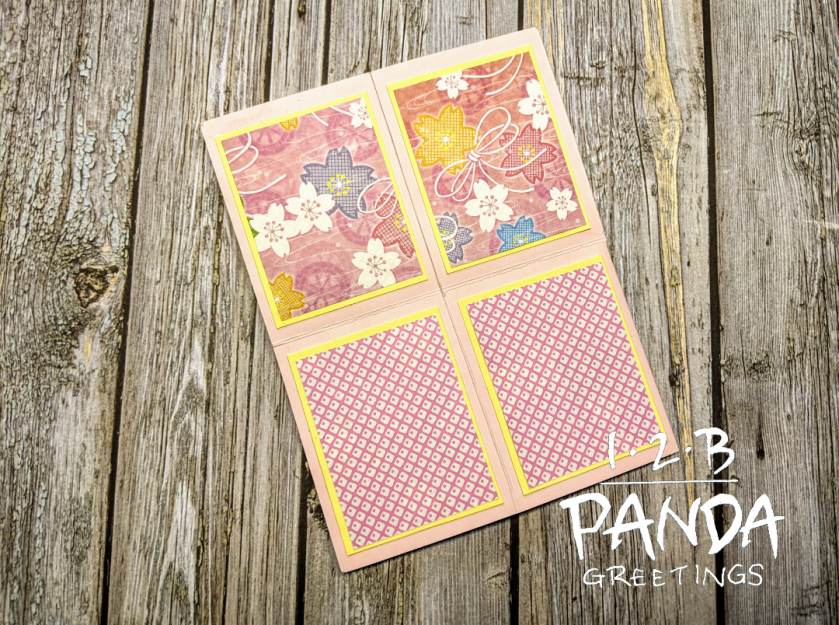
This card has 4 slats and the decorative paper for the panels was actually origami paper that I bought at Daiso.

I assembled the interior of my card by gluing the pieces directly to the slats or adhering them onto card stock or acetate tabs and gluing them to the slats.

I stamped out, “have a magical day”, with Versafine Onyx Black Ink and heat embossed it with WOW Clear Sparkle Embossing Powder. I fussy cut the sentiment with my Cutterbee scissors and adhered it to the front panel.

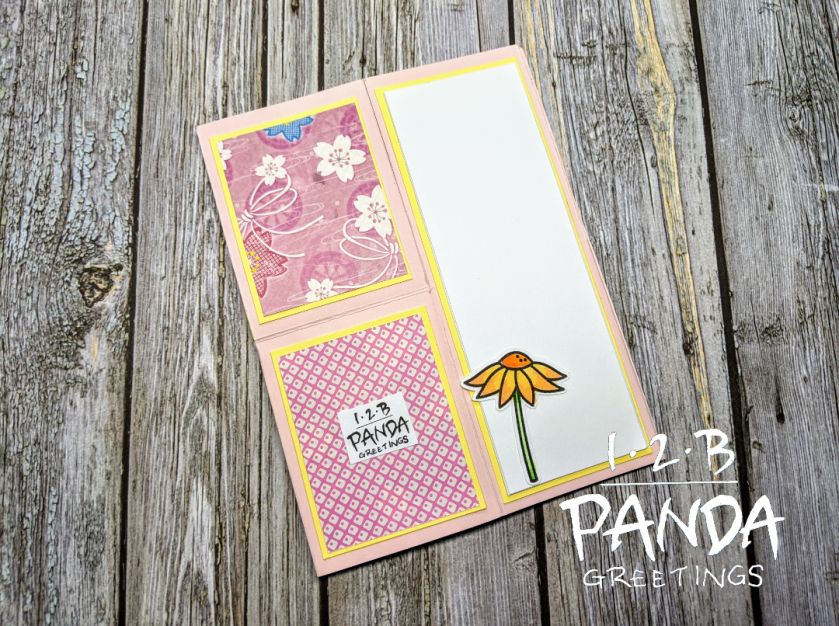
I finished up the card by adhering another flower to the back writing space.

Screenshot_20200306-164027_2

That finishes up my card. Unfortunately, the photos don’t show how sparkly this card actually is. You can check it out in action here:

Screenshot_20200306-163949_2

If you want to check out the Lawn Fawnatics Challenge for yourself, you can check it out here.

This card was also entered into the 30 Day Colouring Challenge
here and the Simon Says Stamp Wednesday Challenge here.

I hope you all like my card. Thanks for stopping by!
Mama Elephant Little Train Agenda Birthday Shaker Card

Hey Everybody!!!
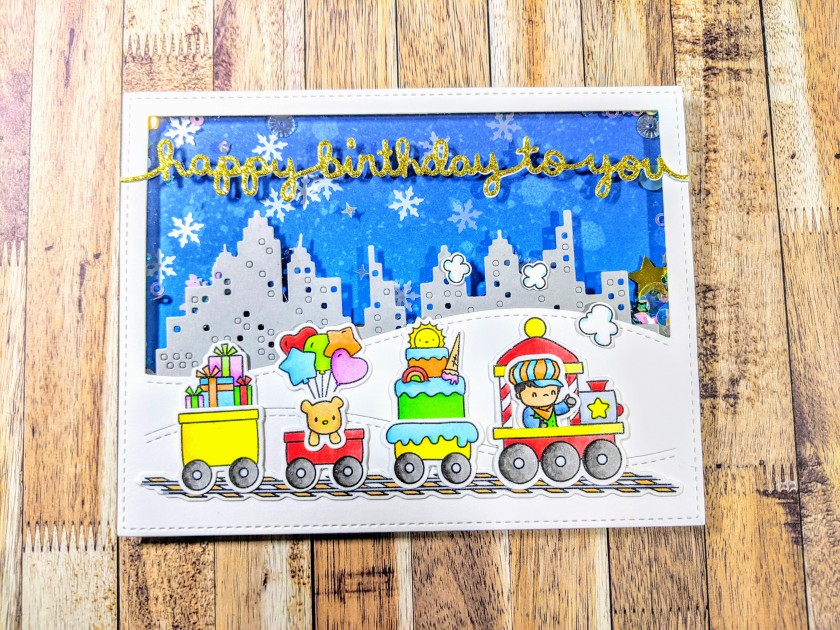
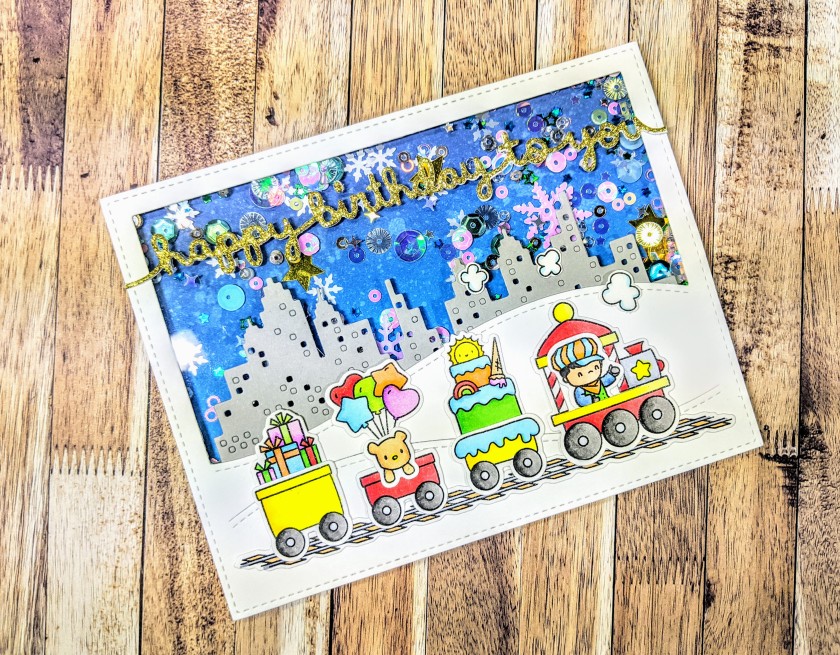
This is a custom card request from my Etsy shop. My client wanted a train shaker card for her son and I was happy to oblige!

Surprise, surprise, I had Mama Elephant’s Little Train Agenda Stamp and Die sets sitting in my to-use pile so I finally get to use them!!! What’s nice about the coordinating dies is that they cut out the window for the engine of the train.

IMG_20200108_164921

Anyways, so I stamped the images using Hero Arts Intense Black Ink and die cut the images with the coordinating dies. I coloured the images with the following Copic Markers: E95, YR00, YG09, YG06, YG03, YG11, E33, E31, E53, E42, B97, B95, B02, B00, V04, V01, C1, 0, C3, C5, T7, T5, T3, Y08, Y06, Y11, YR16, YR02, R20, R29, R27, and R35.

I die cut pieces for my background using Lawn Fawn’s Stitched Hillside Backdrop: Landscape and Mama Elephant’s Cityscape Die. I used Lawn Fawn’s Happy Birthday Border which is a scripty die cut that says, “Happy birthday to you” and die cut it once in Recollections Gold Glitter cardstock and 110lb white card stock and glued them together to create a bit of dimension.

I created an inkblended background using Distress Oxide Inks Salty Ocean and Faded Jeans and sprayed water to create a splattered effect.

I used 3M foam tape and a piece of acetate to create my shaker component and filled the shaker with an assortment of sequins and confetti.

I adhered all my elements onto my card front and glued the card front to a dark blue card base with my ATG adhesive. I finished the front of the card by applying Clear Wink Of Stella to the star on the train, the balloons, the sun, the ice cream cone, and the presents. For the inside of the card, I die cut a the stitched rectangle from Mama Elephant’s Basic Set and cut a light grey piece of card stock to use as a matte for the stitched rectangle.

IMG_20200108_165046

That finishes up my card. The 30 Day Coloring Challenge is going on right now so this card was entered in that. You can check out the details
here.

challenge_graphic_march_20_650

This card was also entered into Simon Says Stamps Wednesday Challenge here.

Thanks for stopping by!!!