Lawn Fawn Summer Release Haul and Review

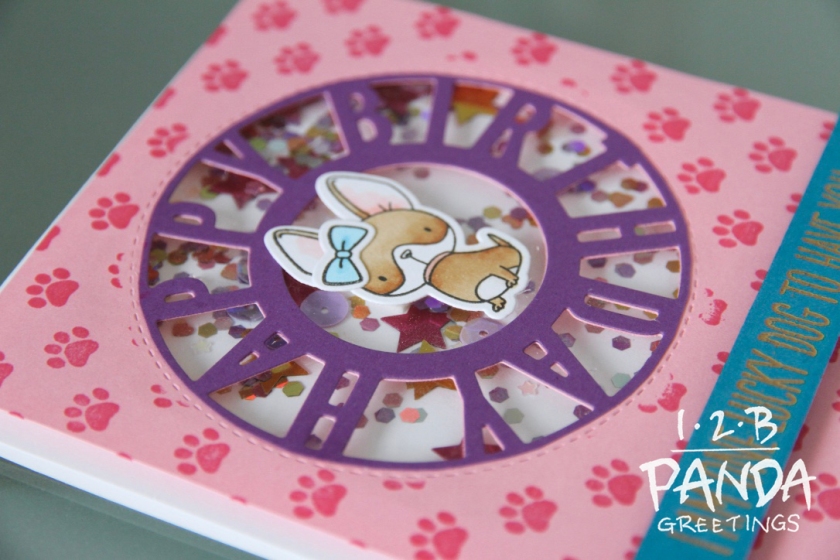
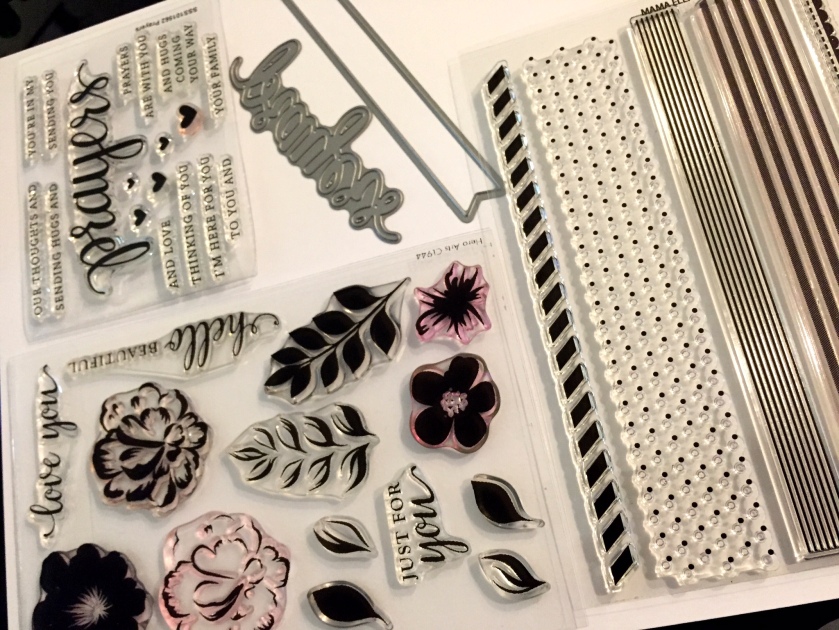
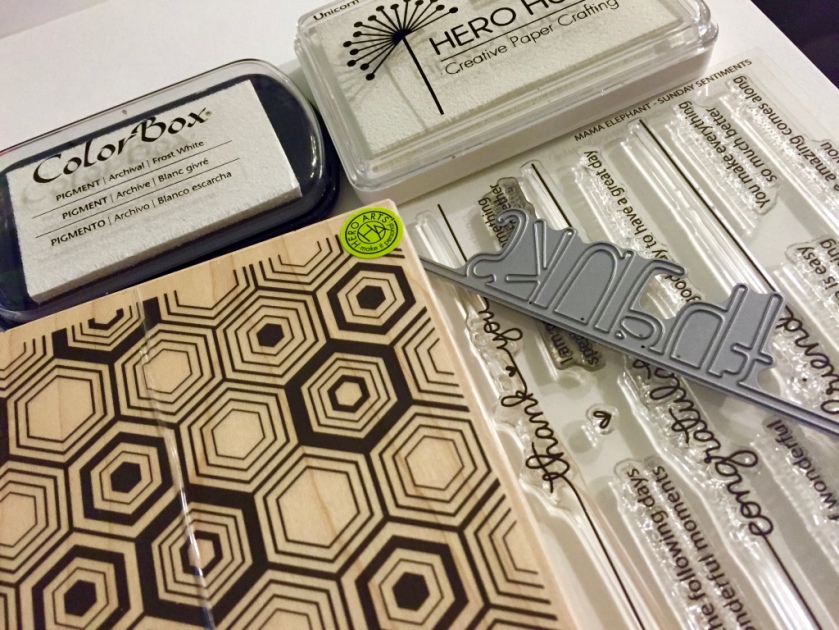
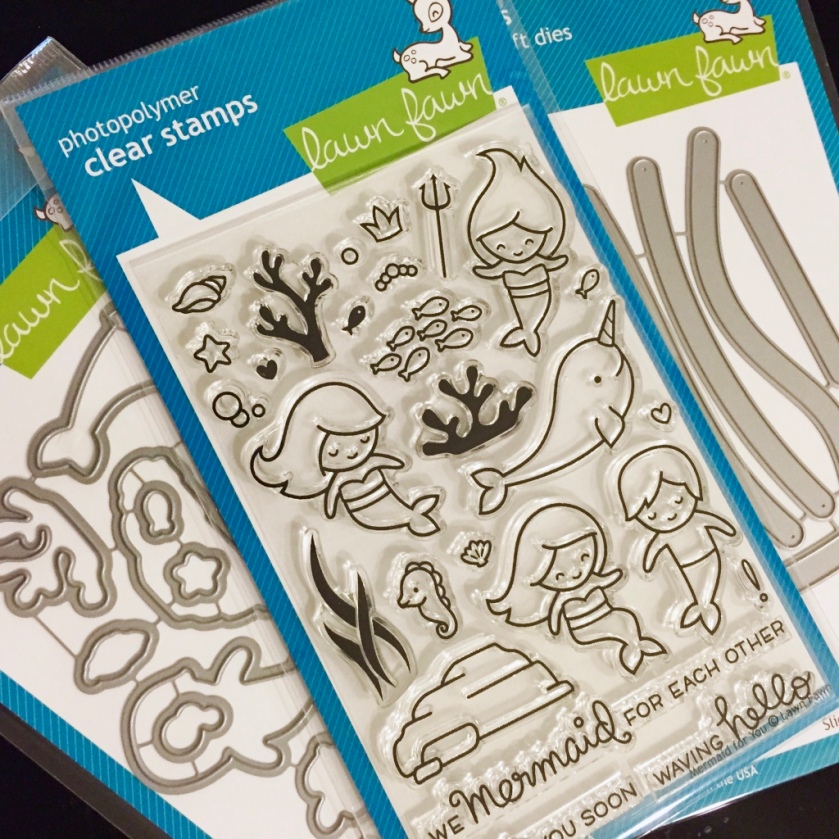
Happy mail came for me few days ago. I WAS SO EXCITED! This particular order had a few items from Lawn Fawn’s summer release including the Mermaid For You stamp set, coordinating dies, Slide On Over dies, and the new inks: chilli pepper, guava, and blue jay. Ever since I saw the preview for the release I had my eye on the mermaid set!

thumb_IMG_3842_1024

I love it when companies release sets that coordinate well with previously released sets (ie. Fintastic Friends and Jelly Star). What’s great about this set is that it’s so unique! I haven’t seen a mermaid stamp set quite like this one on the market yet.

thumb_IMG_3849_1024

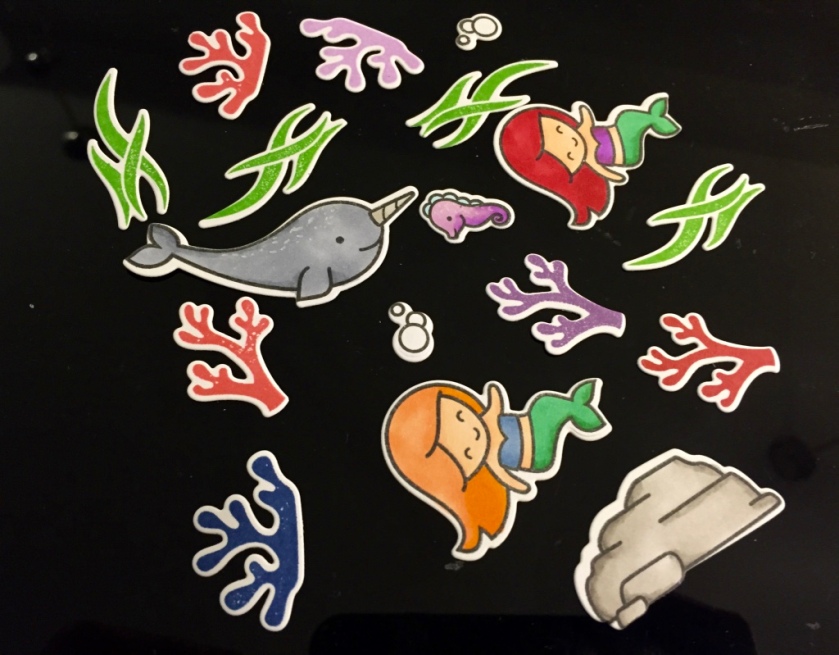
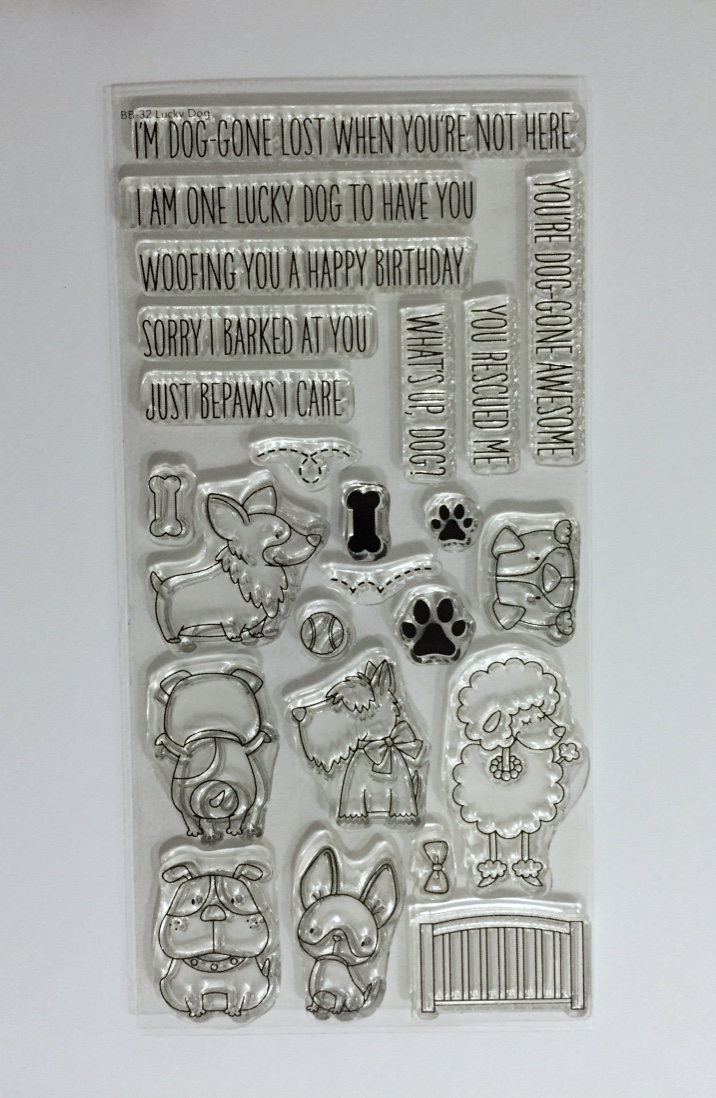
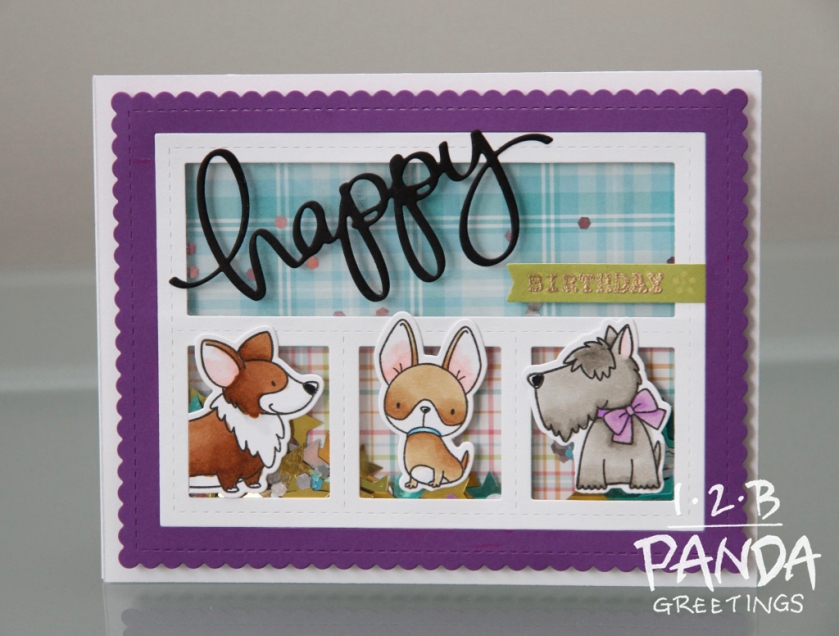
The mermaid characters were drawn in a very cute style and come with  accessory stamps to dress up them up. In addition to that, Lawn fawn has even included a cute seahorse, narwhale, several scene building stamps (coral, seaweed, large rock, and fish), and a couple pun filled sentiments: “We mermaid for each other”, “Sea you soon”, and “Waving hello”. I’ve kind of been working on scene building lately  and I don’t have many other sets that can build ocean scenes with so the Mermaid For You set is a great start!

thumb_IMG_6028_1024


Another thing that I was really excited about was playing with the Slide On Over dies (partially pictured in the first photo, on the right). I LOVE INTERACTIVE CARDS!!  This is a great use for pennies except too bad Canada got rid of pennies in 2013!! I thankfully have a handful of American pennies to try this with from my last trip to Florida! Lawn Fawn nicely included sliding slots for both long and short straight and curved tracks and one partially and one really curvy track. So far I have only had time to made one but I am really looking forward to making more of these interactive cards. Check it out in action below.


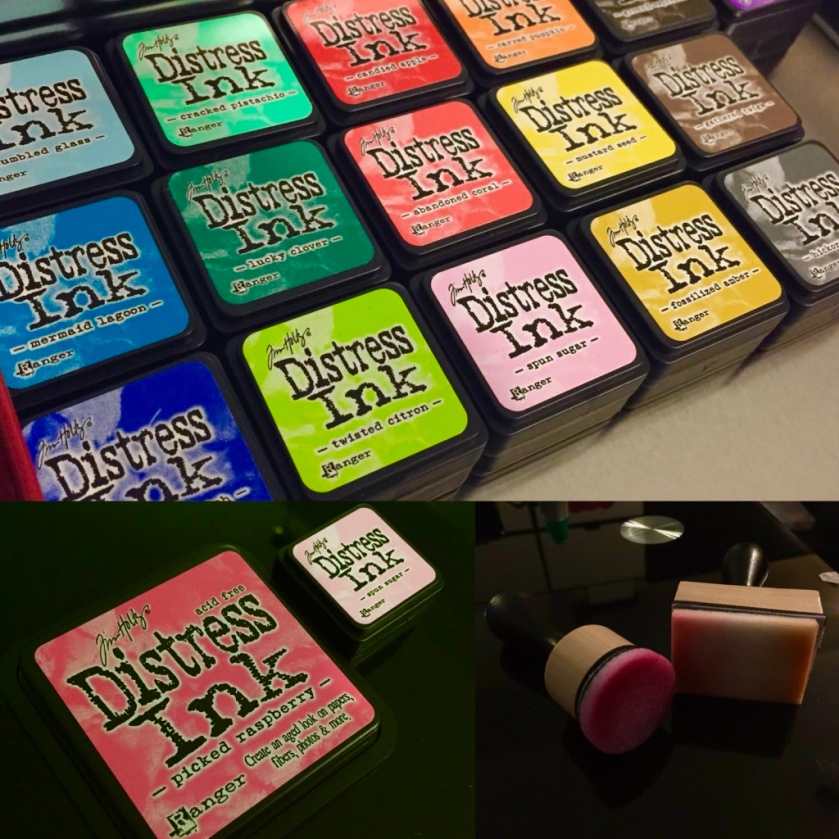
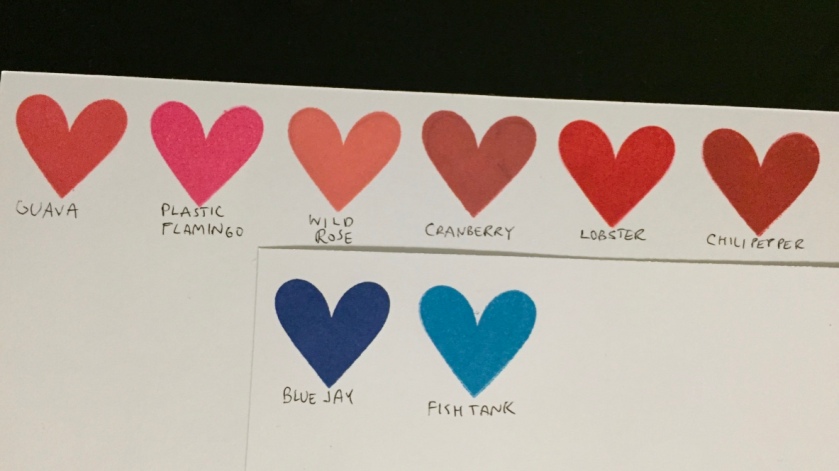
Lawn Fawn also added three new inks to their collection: Guava, Chili Pepper, and Blue Jay.

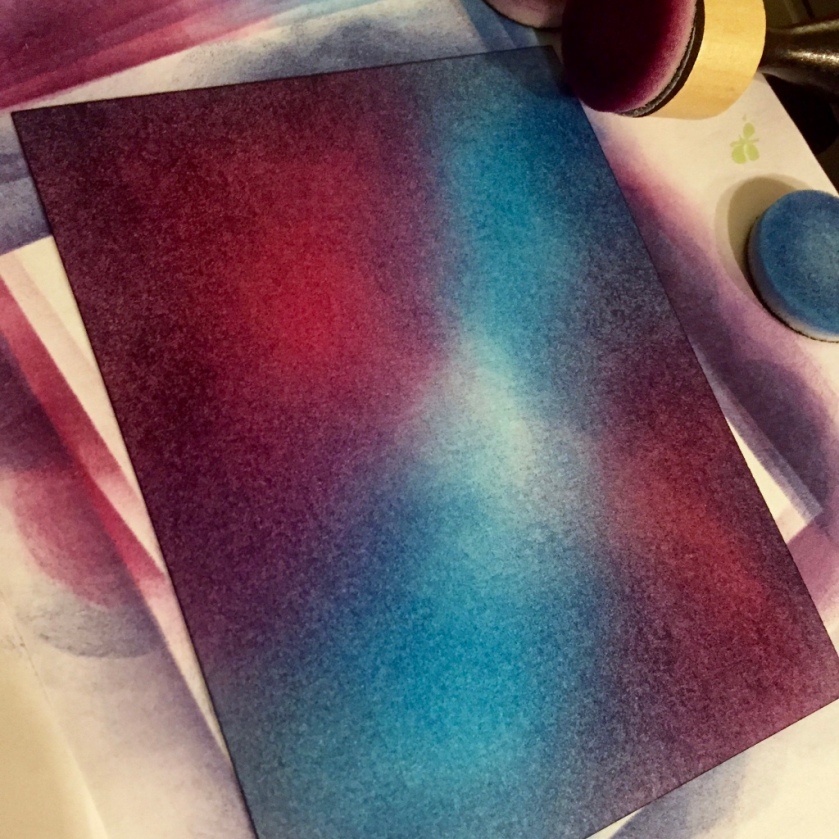
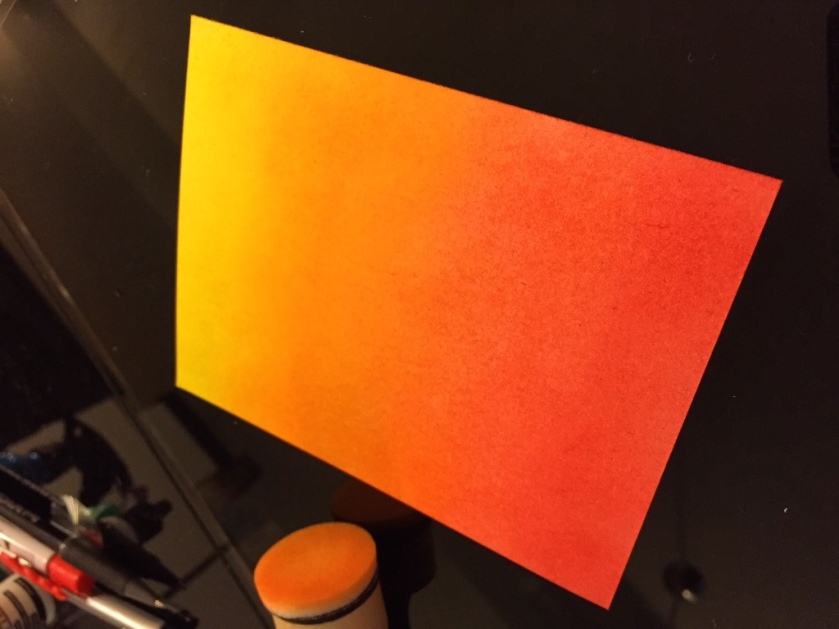
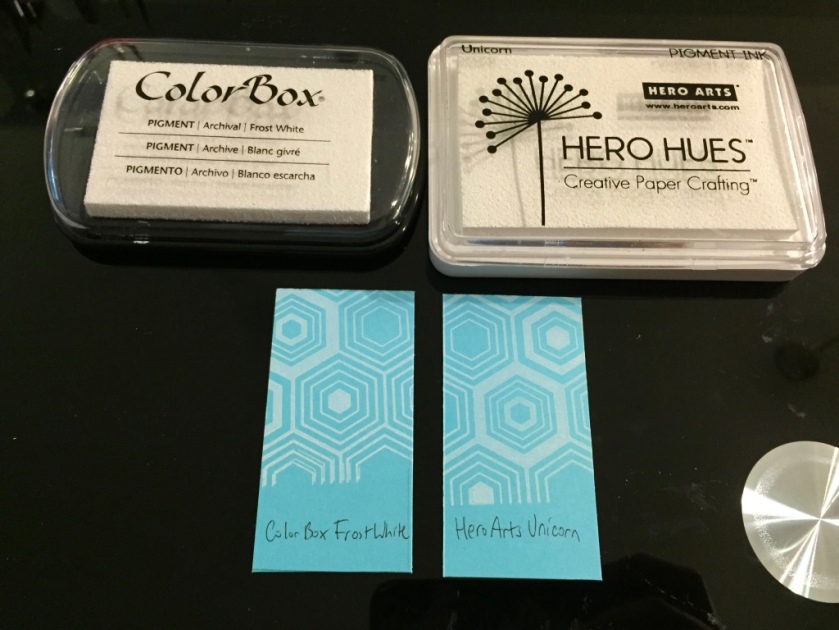
Compared to other inks in their collection, Guava’s kind of a slightly darker, bolder Wild Rose and Chili Pepper is like a cross between Cranberry and Lobster. These two new ink additions would be really useful for layering stamps. I really like Blue Jay. It’s a beautiful royal blue and a great addition to their colour collection. Here’s what they look like in comparison to similar colours in their collection.

thumb_IMG_3872_1024

I’m super excited to start playing more with my new stuff! Look forward to a tutorial in the future! If anybody is interested in anything in this post, the links are below.

Stamp Spotlight: Lawn Fawn- Rooting For You

The Rooting For You stamp set was part of Lawn Fawn’s Spring release this year. I guess I’m a bit late writing about it but I didn’t have my blog at that point in time. I only allowed myself to buy one new stamp set out of their spring release and I chose this set because it was absolutely adorable! I loved that they were layering stamps and that you could add cute little expressions to them. The stamp set comes with a carrot, radish, beet, turnip, their associated leaves, facial expressions, watering can,  vegetable markers, and 2 sentiments (I’m/we’re rooting for you; Have an upbeet day). I wish there were more pun filled vegetable related sentiments in the set but other than that, I have no qualms.

thumb_IMG_3819_1024
Lawn Fawn Rooting For You Stamp set and coordinating dies

It’s kind of funny, for the longest time I didn’t realize what the two black circles were at the bottom of the stamp set (It’s not just me, right?).  It suddenly came to me one day that they were the rosy cheeks for the vegetables. Love it! The rosy cheeks add such a great extra touch to the facial expressions of the vegetables.

So I decided to make some birthday cards with this set.

birthday beets wmbirthday carrots wmbirthday radishes wm

The radish birthday card is my favourite out of the three and unfortunately, the photo does not do it justice as there’s fine sparkles on the “happy” text as well as the water droplets and cloud. This is how I made the radish card:

  1. Cut green card stock to make card front to A2 size (5.5″ x 4.25″) using stitched die. Heat emboss star background with gold embossing powder. I tried to find the stamp set that the tiny stars were from and I wasn’t able to find. It is a Lawn Fawn set called Teeny Tiny Backgrounds but I think it may have retired.thumb_IMG_3822_1024
  2. With brown card stock, die cut simple stitched hillside border then take A2 size stitched rectangle die and die cut bottom and side edges as to add the stitched lines on the outer edge.
  3. Cut white card stock panel slightly smaller than 4.25″ wide, just enough to be able to see the embossing on the green card stock. Emboss the white card stock with chevron embossing folder and use A2 sized stitched rectangle die to make stitch lines on top edge of white card stock. Adhere to the green card stock in the centre of panel. I was unable to find this embossing folder too! It’s an embossing folder by Lifestyle Crafts and I think it also retired! 😦 How unfortunate.thumb_IMG_3823_1024
  4. Stamp out and die cut watering can, radishes, leaves, and vegetable marker. Adhere the leafy part of the radish to the radishes.
  5. Die cut  “happy” letters, birthday script, stitched sun, cloud,  and water droplets.
  6. Position hill side on card front and use dimensional foam adhesive to adhere to card front for added dimension.
  7. Position other elements on card front. Glue sun, cloud, birthday script, vegetable marking, bottom radish, and “happy” letters to card front.
  8. Adhere watering can, water droplets and 2 radishes to card front on dimensional foam adhesive. You will need to cut them to made it fit the water droplets.
  9. Use clear Wink of Stella glitter pen and brush over water droplets and “Happy” letters.
  10. Adhere card front to card base using tape runner adhesive.

So that concludes my card. I have listed my supplies below for anybody interested. Lawn Fawn’s summer release was last week and I am so excited!! I ordered the Mermaid For You stamp set and I am really looking forward to working with it! I really wish shipping to Canada from the U.S. didn’t take so long. On the upside, there’s a coupon code right now for $5 off any purchase of $5 or more at Simon Says Stamp. Coupon Code:”Breezy” at checkout (valid until June 14, 2016)!

So that’s all from me for now. Hope you guys are having a fabulous May long weekend!

MFT Sketch Challenge 281

While I had the ball rolling with the Lucky Dog stamp set from the last post,  I decided to use the same stamp set for MFT’s Sketch Challenge this week. This is the sketch for this week.

281

A couple months ago I bought MFT’s Die-namics Birthday Centerpieces and I decided to pull it out for this challenge. I decided to continue on with my shaker card streak and make this one also into a shaker card. This is what I came up with:

thumb_IMG_6004_1024thumb_IMG_6006_1024

I’m really liking making shaker cards these days. They’re just so much fun and something you can’t really buy when you go to Hallmark.

So I took a piece of light pink card stock and cut it so it was slightly smaller than a regular A2 size (5.5″ x 4.25″) and rounded off the corners with a corner chomper. I took the birthday centerpiece die and die cut it once on the light pink card stock and another time on a scrap piece of purple card stock. I used scissors and cut out the centerpiece from the purple, making sure to exclude the  stitched border and adhered it on top of pink card stock being diligent to make the die cut images line up.

I stamped and die cut the chihuahua image and bow from MFT’s Lucky Dog stamp set and Copic coloured it using E31, E33, B02, and B00. I used a bit of glue to secure the bow to the dogs head.

I took some masking paper and the Birthday Centerpieces die and drew around it and cut it out of the masking paper. I placed that mask over the die cut pink and purple card stock and stamped the background using MFT’s Paw Print Background in Lawn Fawn Plastic Flamingo ink. I cut out a piece of acetate and adhered it to the card front behind the die cut and glued the chihuahua to the front. I then flipped the card front over and adhered foam adhesive to the back to create a space for the shaker components. I selected my shaker components (confetti, chunky glitter, and sequins) and placed it in my shaker card and adhered it to my card base.

I cut a banner out of blue card stock and heat embossed the greeting “I am one lucky dog to have you” in Simon Says Stamp Antique Gold embossing powder and stuck it to the card front using square dimensional foam adhesive.

I’m super happy how the card turned out. I recently discovered these sketch challenges and I think they’re kind of fun! I hope to participate more in them in the future if time permits! Supplies are listed below for anybody interested.

Commissioned project: Puppy Birthday Shaker Card

Last week I was commissioned to make a dog birthday card for someone. I chose MFT’s Lucky Dog stamp set and was so excited to break it out because I hadn’t used it yet. It’s hard to choose which dog is my favourite! thumb_IMG_3820_1024

I made three different cards for him to choose from and this is the one that he ended up choosing:

thumb_IMG_6000_1024

The word “birthday” is reflecting light but it did emboss fine. The picture does not do it justice. The frames were cut using MFT’s Die-namics Blueprints 27 and the background paper is Lawn Fawn’s Perfectly Plaid paper. Lawn fawn named each plaid design after their staff members. These particular plaid designs are Nancy and Kristin. This plaid paper pack is absolutely beautiful and is currently my favourite paper pack to use. Each plaid pattern comes in both straight and diagonal and come in both 6″x 6″ and 12″x 12″ paper pads.

thumb_IMG_3821_1024
Sample of Perfectly Plaid paper pack

I took a A2 sized piece of white card stock and marked out where the frames would be and placed my plaid paper accordingly as so the white card stock would not show with the frame overtop.

I adhered some acetate to the frame then die cut the “happy” text and glued it to the acetate. I cut a little banner out of paper that was originally an envelope from a card I had received (yay recycling! ^_^) and embossed birthday with Simon Says Stamp’s Antique Gold embossing powder and adhered it to the frame.

I stamped the dogs in black ink then coloured them with Copic Markers. The colours I use are as follows:

Corgi: E08, E04, R20                                                                                                                                         Chihuahua: E33, E31, R20, B00                                                                                                                     Terrier: W5, W2, R20, V04, V01

I die cut the dogs out using coordinating dies and adhered them to the acetate. I applied 3M foam adhesive to the back and selected my shaker card components (chunky glitter, star confetti, and sequins) and placed them in my shaker card. Next, I adhered the frame/acetate part to the white/plaid card stock card front with the 3M foam. I glued the card front to my card base and stamped a special message inside. That finishes my card for today. I hope whoever receives it really likes it! My supplies are listed below for whoever is interested!


http://static.inlinkz.com/ppr.js

Stamp Spotlight: Hero Arts- For You Flowers

Continuing from the last post, I had cut the water colour panels out for those thank you cards and I was left with a frame. I didn’t want the frames to go to waste so I decided to use them for these cards.

I ink blended the frames with just one colour. I used carved pumpkin (orange), picked raspberry (pink), and peacock feathers (bluish green) Distress inks and then sprayed them with water to get that water droplet effect.
I had recently acquired this Hero Arts layering flower stamps on a recent order and decided to give them a try. I’m kind of still new to this whole card making thing and layer stamps have probably been around for a while, but I’m still in awe every time I use them. I just think they’re are so neat and the finished product looks so great! Each card I did was kind of the same but a little bit different. So I stamped all the flowers with a variety of Lawn Fawn inks (Except the light blue is Hero Arts). I’m just using what ink I have on hand.
I die cut the stamped images and played with the arrangement of them until I was happy. I used a bit of adhesive to stick the flowers together so I wouldn’t lose my arrangement. I took a piece of white card stock and cut it to an A2 size (5.5″x 4.25) and stamped a border pattern using Mama Elephants Boutique Borders set 2/3’s of the way down the panel. You can just do it directly on the card base but out of personal preference, I like doing a separate card front and then adhering it onto the card base.

IMG_3597

I die cut my banners out, as well as the prayers and totally fabulous text. You don’t necessarily need a banner die to do this. You can also just cut a fish tail into a strip of paper by making a small cut in the centre then making 2 diagonal cuts from the corners that meet at the centre.

The prayers stamp set is a great one to have. It’s a Hero Arts set that comes with the prayers word stamp and sentiments,  as well as heart stamps that come in a variety of sizes. It also comes with a coordinating prayers word die. Twenty five percent of the profits from this set go to the “Lasting Hearts” Fundraiser and Card Drive. It’s a charity for mothers who have lost a child to miscarriage. For more information, please see here.

I kind of went a tangent there, back to how I made these cards. The prayers word I die cut 3 times and adhered them together so it would be thicker and add a bit of dimension to the card. I then heat embossed the “And hugs coming your way” sentiment on the blue card and the “Hey beautiful”on the banner or the orange card using liquid platinum by Ranger. I took 3M foam adhesive and adhered my frames, flowers and banners in place to create dimension and just used Tombow Mono Multi glue (it’s liquid glue but you can use whatever you have) to adhere the prayers word. I adhered the sequins on the hey beautiful and totally fabulous card with the same liquid glue then mounted the card fronts onto the card bases using a tape runner adhesive.

If you’re interested in any of the supplies I used in this post, I have linked them below.

That’s all from me for now, hope you guys have a great day!

http://static.inlinkz.com/ppr.js

For my Canadian friends, if you can’t find Distress ink at your local Micheals, you can buy some on Amazon.ca!

Ink blending and Emboss resist (Wedding Thank You Cards: Part 3)

Let’s talk about Distress inks. I absolutely LOVE Distress inks. I briefly mentioned them in my first post, but let me enlighten you more in depth. They are so versatile. You can use them for regular stamping applications, they are amazing to blend with, and are also fade resistant. Furthermore, the ink also reacts with water so you can use them as watercolours and even spray water over a finished product to create a water droplet effect.

Distress inks come in two sizes. Both are great depending on your needs. I don’t have much space so I prefer the smaller size so I can fit them all into a small container. They were designed so that you can stack them too, which is kind of neat. I just have a small qualm with the larger Distress ink container though, as I find that the lids aren’t very secure and come off easily. So if you like to store them on their side, be careful!! I would hate for them to dry out on you!thumb_distress ink_1024

Ink blending and emboss resist techniques are by far my favourite techniques that I discovered when I started paper crafting. Distress inks blend so well! It’s like the ink stays wet for the adequate amount of time to allow for smooth blending.

Here’s how you do it:

  1. Stamp, apply and heat set embossing powder like normal (white embossing powder works well for this)
  2. Apply Distress ink using foam/sponge in circular motions. Keep rubbing to blend into smooth application. Add more ink as needed.
  3. Use dry paper towel to buff embossed surfaces to get rid of excess ink.

Distress inks come in such a large array of colours that there are a variety of possible combinations of colours that you can blend with! I’m slowly building my collection of colours. Ranger (the company that makes Distress ink) also carries great wood handled circle and rectangle sponge applicators. The applicators come with a few sponges and are also sold separately. I know there are other products out there but I bought these to try first and I liked them so I haven’t tried using anything else!

thumb_IMG_3113_1024
Dusty Concord, seedless preserves, picked raspberry, salty ocean, chipped sapphire
thumb_IMG_3148_1024
Mustard seed, carved pumpkin, abandoned coral

Here is another wedding thank you card that I did using this technique.

Thank you ink blend green wm
Peacock feathers, cracked pistachio, and twisted citron

The thank you script stamp and stitched rectangle die is from Mama Elephant and the scallop border is by Wplus9. I’m sure other companies make stitched and scalloped dies but this is just what I have on hand. I made a few of these in different colours to give away. Honestly, I’m kind of sick of thank you cards so you can look forward to seeing cards of other occasions soon!

If you’re interested in any of the products I use they are listed below.

For my Canadian friends, here are the things that you can get from Amazon.ca:

Cuttlebug vs. Big Shot (Wedding Thank You Cards: Part 2)

A few years ago, I thought about getting into scrapbooking but decided not to for a few reasons. While I was sitting on the fence about whether or not to pursue this hobby, I found myself at a local arts and crafts store staring at a hand crank die cut and embossing tool. I didn’t quite get how it worked by the box but it was really intriguing. With my coupon in hand, I was tempted to purchase the contraption but decided against it and put it away. Scrapbooking was not for me. I realized I was more into baking at that stage in my life, and although the thought of scrapbooking all my photos and making them organized and pretty was appealing, the sheer amount of things that I would need to do such a hobby was not. I also didn’t like the idea of spending so much time on a project (ie. page layout) and not being able to share it/ give it away.

Four years later, I started card making and the die cut machine came up again. Last Christmas, I decided to get one as a Christmas present to myself but my next problem was I couldn’t decide which one to buy. I wasn’t quite ready to fork out like $300+ for an electric die cutting machine so that thankfully limited my options to a few manual ones. The most common names that came up in my research were Cuttlebug and Big Shot.  I ended up choosing the Cuttlebug for a few reasons. The main reason was SPACE! Although the Big Shot has a sturdier base,  I unfortunately don’t have the luxury of space at home so the fact that the Cuttlebug’s platform nicely folds up for easier storage was a great selling point for me. It’s also a little bit cheaper than buying the Big Shot. You have to buy an extra “C” plate for the Cuttlebug if you want to use it for die cutting, but the combined cost is still cheaper than the Big Shot. Amazon.ca seems to be fluctuating in price, but when I got it, it was only $70!

thumb_IMG_3713_1024

A downside to the Cuttlebug is the platform isn’t large enough for some of the larger dies. I honestly haven’t bought any and I don’t think I will. I can see this being a problem for like scrapbookers or people that want to use those big Card Framelit dies by Sizzix. The largest thing I’ve put through the Cuttlebug was a 6″x6″ We R Memory Keepers embossing folder and they work just fine. I also read complaints about the suction not working well after a while on the Cuttlebug as well, but I find if you just wipe it with a damp cloth it will work great again. It’s just all the dust/embossing powder/glitter etc that gets on it that prevents it from suctioning well.

thumb_IMG_3715_1024

The Cuttlebug and Big Shot are both great machines that basically will do the same job minus a few differences, but after a bit of research, the Cuttlebug is better suited to my needs.

Here’s some more simple wedding cards using embossing folders and die cuts!

thumb_IMG_5781_1024
Simple and classy thank you card using Lifestyle Crafts Embossing Folder and Mama Elephant’s Dainty Bow die.

I embossed this card with an embossing folder from Lifestyle Crafts. I think this particular embossing folder might have been discontinued. I tried to search for it so I can link it below if anybody wants one but I can’t seem to find it anymore :(. I cut a strip of patterned paper and adhered it to the card base where the embossing ends. I die cut the Dainty Bow my Mama Elephant and assembled it with liquid glue and adhered it to the paper ribbon. I used the, “Thanks ever so much” stamp from the Mama Elephant Water Blooms stamp set to stamp the sentiment inside the card.

thumb_IMG_5672_1024
Stitched border by Mama Elephant; Next level embossing folder by We R Memory Keepers; Simon Says Stamp thank you heart die.
thumb_IMG_5665_1024
Mama Elephant landscape trio and thanks script creative cuts.
thank you sweater angle wm
Same as above; Lifestyle Crafts embossing chevron embossing folder

I selected 1 pattern paper and 2 solid card stock colours that would match with that pattern. I cut down and adhered the pattern paper to fit the card base and used a corner chomper to round off the bottom corners. I die cut the solid card stock pieces with one of the hill borders from Mama Elephant’s landscape trio and the thanks script die and adhered them to the card base. I really love that the hill border die is stitched. It just adds a great touch to the card. For the teal card, I took my top panel of solid card stock  and a Lifestyle Crafts Chevron Embossing Folder and ran it through my Cuttlebug before adhering it to my card base. Because this was a thank you card for my wedding, I used the same sentiment that I stamped in the cards in my last post from Mama Elephant’s Sunday Sentiments stamp set, ” I am grateful that something special has brought us together”.

I hope you guys like these cards! If you are interested in any of the products I used in this post, they are listed below. I will be continuing on with my thank you card series in the next post as well.

For my Canadian friends, here’s some things you can get off Amazon.ca


Wedding Thank You Cards: Part 1

I’m backlogged in my posts a bit. I have so much to catch up on!! While I was recovering from surgery, I decided to take on my wedding thank you cards as a project. Unfortunately, I had already bought some cards and written some of the thank you cards out prior to my surgery and urge to get into card making, so not everybody received a handmade card. The majority of them looked like this:

thumb_IMG_5646_1024

thumb_IMG_5647_1024


I wanted them to be clean and simple. I also wanted them to be feminine and masculine looking and I wanted the cards to follow the same design pattern so I would be able to reproduce them quickly. I decided to use an awesome hexagon background block stamp by Hero Arts for the main design. I really love the design on this stamp. It really stuck out to me when I was looking for background stamps on Amazon because it’s so visually interesting. I bought this as a wood block stamp. Had I had known that it came in a cling version, I would have bought that instead! As much as I like the impression that a rubber stamp gives, I find it takes up too much space to store and I don’t have a lot of space to start with. I need to find a better organization solution or maybe I just need a bigger house hahaha…. >_>

Anyways, for feminine cards I used the thank you script stamp from Mama Elephant’s Sunday Sentiments set and Simon Says Stamp’s Thanks on a line craft die for the more masculine ones.

thumb_IMG_3674_1024


I tried two different white inks for these cards- One by Colorbox and other by Hero Arts. Since I was relatively new to paper crafting when I made these cards, I wasn’t sure what ink was good so I bought both! Here’s a side by side comparison of them.

thumb_IMG_3711_1024

Both are pigment inks so they tend to take a bit of time to dry but I found the Hero Arts ink dried a bit faster. There is also a difference in the material that the ink pads are made of. Color Box is like a soft, thin sponge, while the Hero Arts one is firmer. Personal preference, I like ink application with the Hero Arts one a bit more because of the firmness of the ink pad but both worked well for what I needed it for.

Here’s how I made these Thank you Cards:

  1. Create card base: Cut card stock down to size (8.5″ x 11″) and use bone folder to crease centre so the card bases measure 4.25″ x 5.5″. Set aside.
  2. Cut card front out of coloured card stock (4.25″x 5.5″).
  3. Stamp hexagon stamp diagonally over lower 1/3-1/2 of card front. For more feminine cards, stamp scripty thank you a few millimetres above hexagon design. For more masculine card, die cut thanks from white card stock and adhere to card front.
  4. Trim a few millimetres off each side of the card front and round corners with corner chomper. Adhere card front to card base with adhesive tape runner.
  5. Stamp inside greeting. For these cards I used the Mama Elephant Sunday Sentiments set and stamped, “I am grateful that something special has brought us together.”

I made like sixty of these, then got tired of them and started doing other designs for thank you cards. I’ll share them in the future.  If anybody is interested in the products I used, I have linked them below.

For my Canadian friends, here’s some things you can get from Amazon.ca: